Unity中实现图片拼接的几种方案
最近项目中遇到个问题,二维码是根据不同的用户信息动态生成的,宣传海报背景是固定的图,现在需要将其拼接在一起并分享出去,目前有两种方案分别适用于不同的情况,分别是用 UGUI 拼接好之后然后截图指定区域分享出去,其次是直接一个一个的操作像素点,这里记录了操作中需要注意的点和详细代码实现。
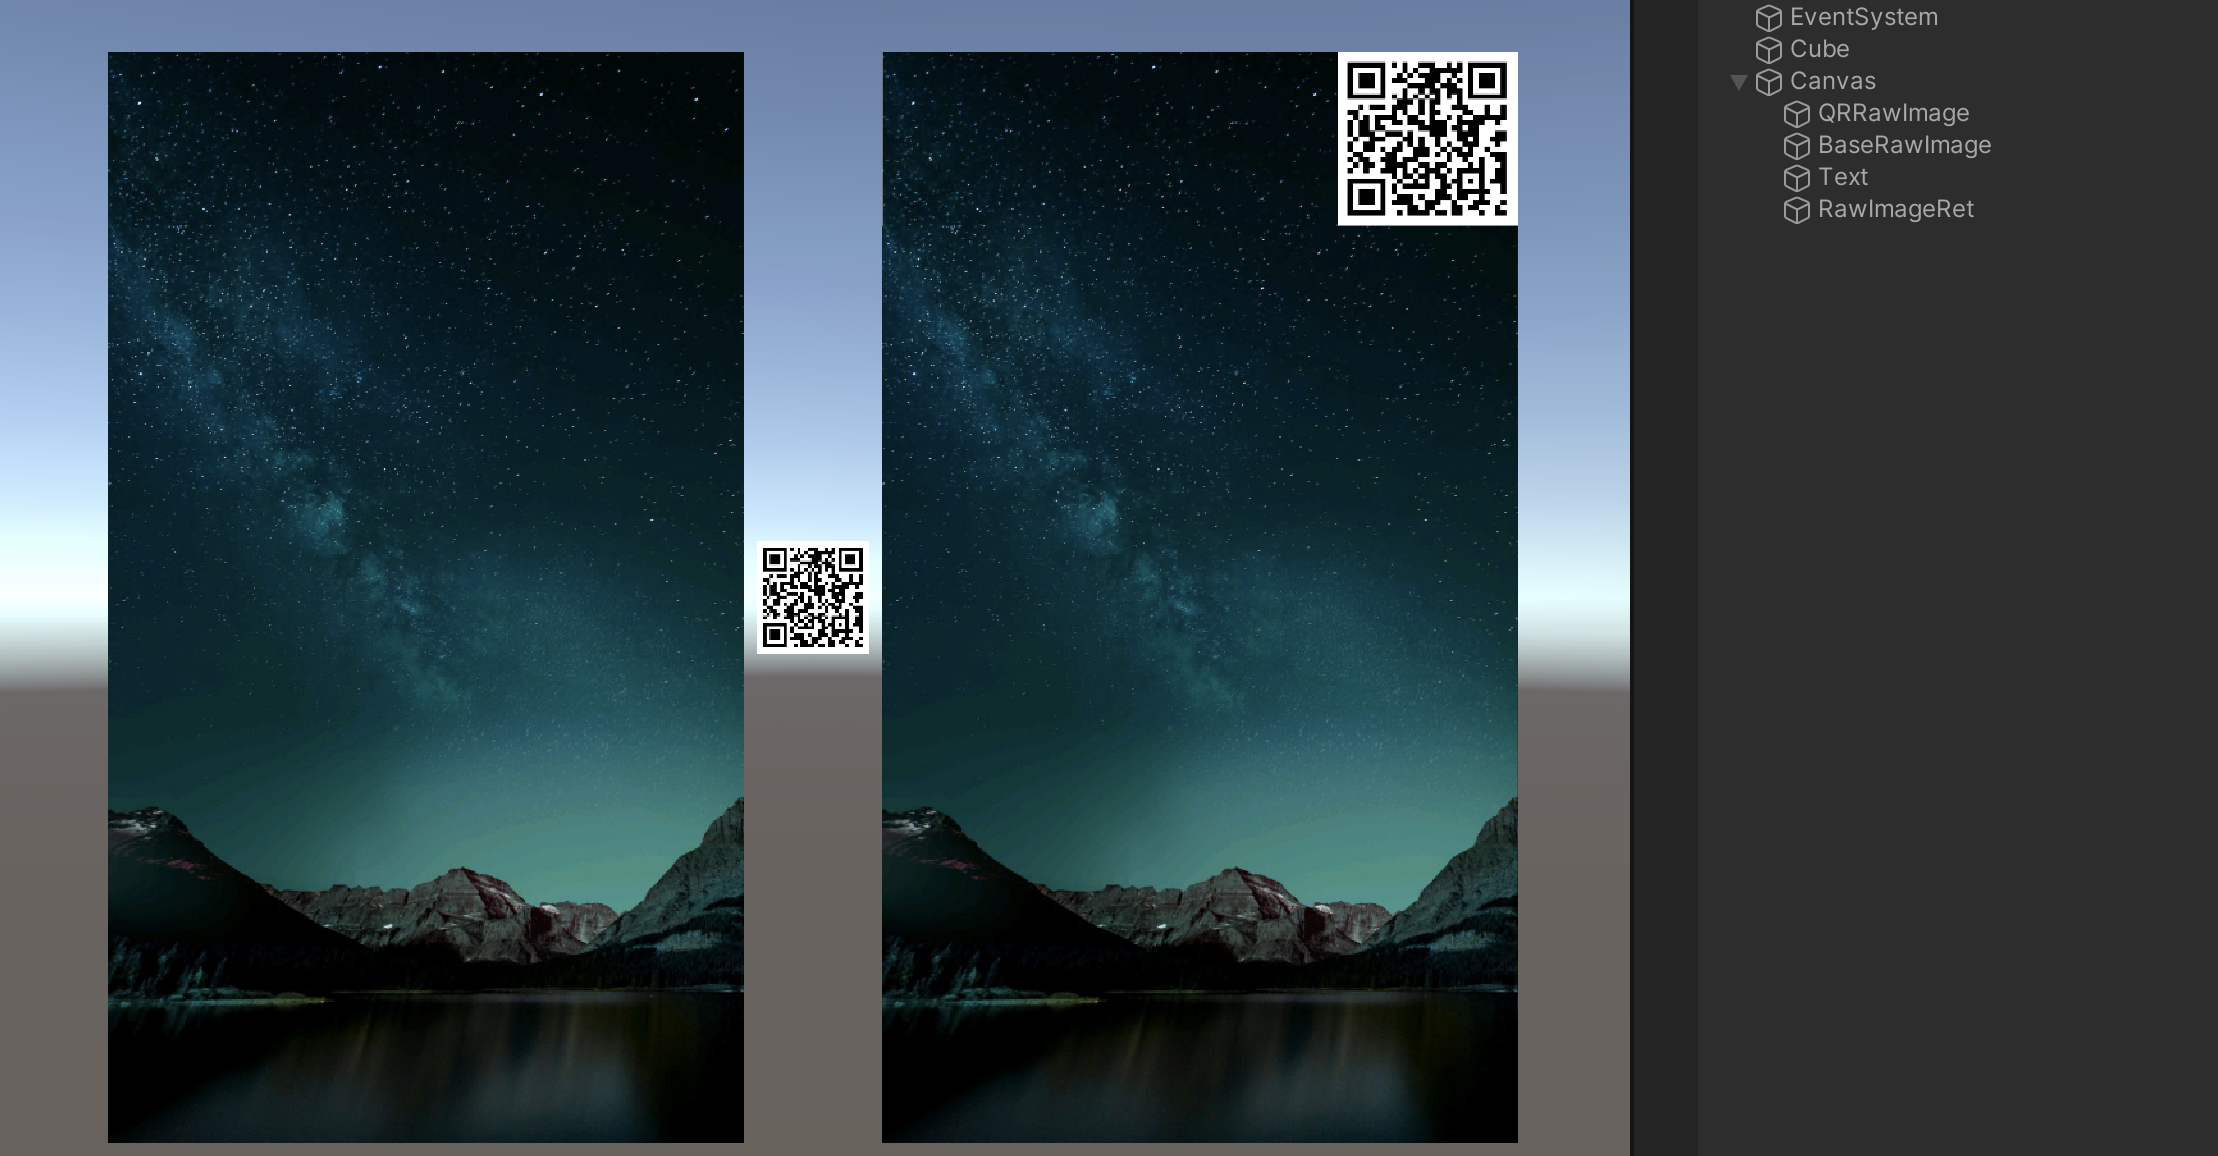
效果展示
具体方案
方案一
适用于分享海报需要展示出来的场景。
UGUI直接拼好内容,代码中控制内容替换,使用 Texture.ReadPixels(rect, 0, 0); 的方式直接截图,然后分享出去即可:
private IEnumerator CaptureCoroutine()
{
    yield return new WaitForEndOfFrame();
    // 截取当前整个屏幕(根据需要,也可设置某个RectTransform)
    Rect rect = new Rect(0, 0, Screen.width, Screen.height);
    Texture2D  texture = new Texture2D((int)rect.width, (int)rect.height, TextureFormat.RGB24, false);
    texture.ReadPixels(rect, 0, 0);
    texture.Apply();
}
注意,一定是等当前帧执行完之后,也就是帧末再截图,否则直接用 Texture2D.ReadPixel 抓取屏幕信息则会报错
方案二
适用于分享海报无需展示的场景。
因为这种的话分享海报无需展示,直接拼接二维码和背景图(如效果展示图中的那种)
/// <summary>
/// 融合图片和二维码,得到新Texture2D ...
/// 根据背景图的大小比例
/// </summary>
/// <param name="tex_base">底图</param>
/// <param name="tex_code">二维码</param>
public static Texture2D MixImagAndQRCode(Texture2D tex_base, Texture2D tex_code)
{
    Texture2D newTexture = Instantiate(tex_base) as Texture2D; ;
    for (int i = 0; i < tex_code.width; i++)
    {
        for (int j = 0; j < tex_code.height; j++)
        {
            // //从底图图片中获取到(w,h)位置的像素
            // Color baseColor = newTexture.GetPixel((int)w, (int)h);
            // 从二维码图片中获取到(i,j)位置的像素
            // Color codeColor = tex_code.GetPixel(i, j);
            newTexture.SetPixel(newTexture.width - i - 1, newTexture.height - j - 1, tex_code.GetPixel(tex_code.width - i - 1, tex_code.height - j - 1));
        }
    }
    newTexture.Apply();
    return newTexture;
}

/// <summary>
/// Texture转换成Texture2D...
/// </summary>
/// <param name="texture"></param>
/// <returns></returns>
Texture2D TextureToTexture2D(Texture texture)
{
    Texture2D texture2D = new Texture2D(texture.width, texture.height, TextureFormat.RGBA32, false);

    RenderTexture currentRT = RenderTexture.active;

    RenderTexture renderTexture = RenderTexture.GetTemporary(texture.width, texture.height, 32);
    Graphics.Blit(texture, renderTexture);

    RenderTexture.active = renderTexture;
    texture2D.ReadPixels(new Rect(0, 0, renderTexture.width, renderTexture.height), 0, 0);
    texture2D.Apply();

    RenderTexture.active = currentRT;
    RenderTexture.ReleaseTemporary(renderTexture);

    return texture2D;
}

/// <summary>
/// 将Texture转为本地PNG ...
/// </summary>
/// <param name="filePath">保存路径,(分享时直接使用)</param>
/// <param name="teture">要保存的Texture</param>
/// <returns></returns>
public static bool saveMainTextureToPng(string filePath, Texture teture)
{
    if (teture.GetType() != typeof(Texture2D))
    {
        return false;
    }
    Texture2D savedTexture = (Texture2D)teture;
    try
    {
        Texture2D newTexture = new Texture2D(savedTexture.width, savedTexture.height, TextureFormat.RGBA32, false);
        newTexture.SetPixels(0, 0, savedTexture.width, savedTexture.height, savedTexture.GetPixels());
        newTexture.Apply();
        byte[] bytes = newTexture.EncodeToPNG();
        if (bytes != null && bytes.Length > 0)
        {
            if (File.Exists(filePath))
            {
                File.Delete(filePath);
            }
            System.IO.File.WriteAllBytes(filePath, bytes);
        }
    }
    catch (IOException ex)
    {
        return false;
    }
    return true;
}
其实也就是一个一个摆像素点而已。另外需要注意的是确保 texture 可读,目标 texture 也可读可写,通过网络下载的图片默认都是 Read/Write Enable的,因此如果有限制的话可以采取从网络下载图片,WWW就可以非常简单的完成这个功能:
coroutine.start(function()
    ---@type CS.UnityEngine.WWW
    local www = CS.UnityEngine.WWW(url)
    coroutine.yield(self.commonService:WaitUntil(function()
        return www.isDone
    end))
    local tex = www.texture
    --- TODO ...
end)
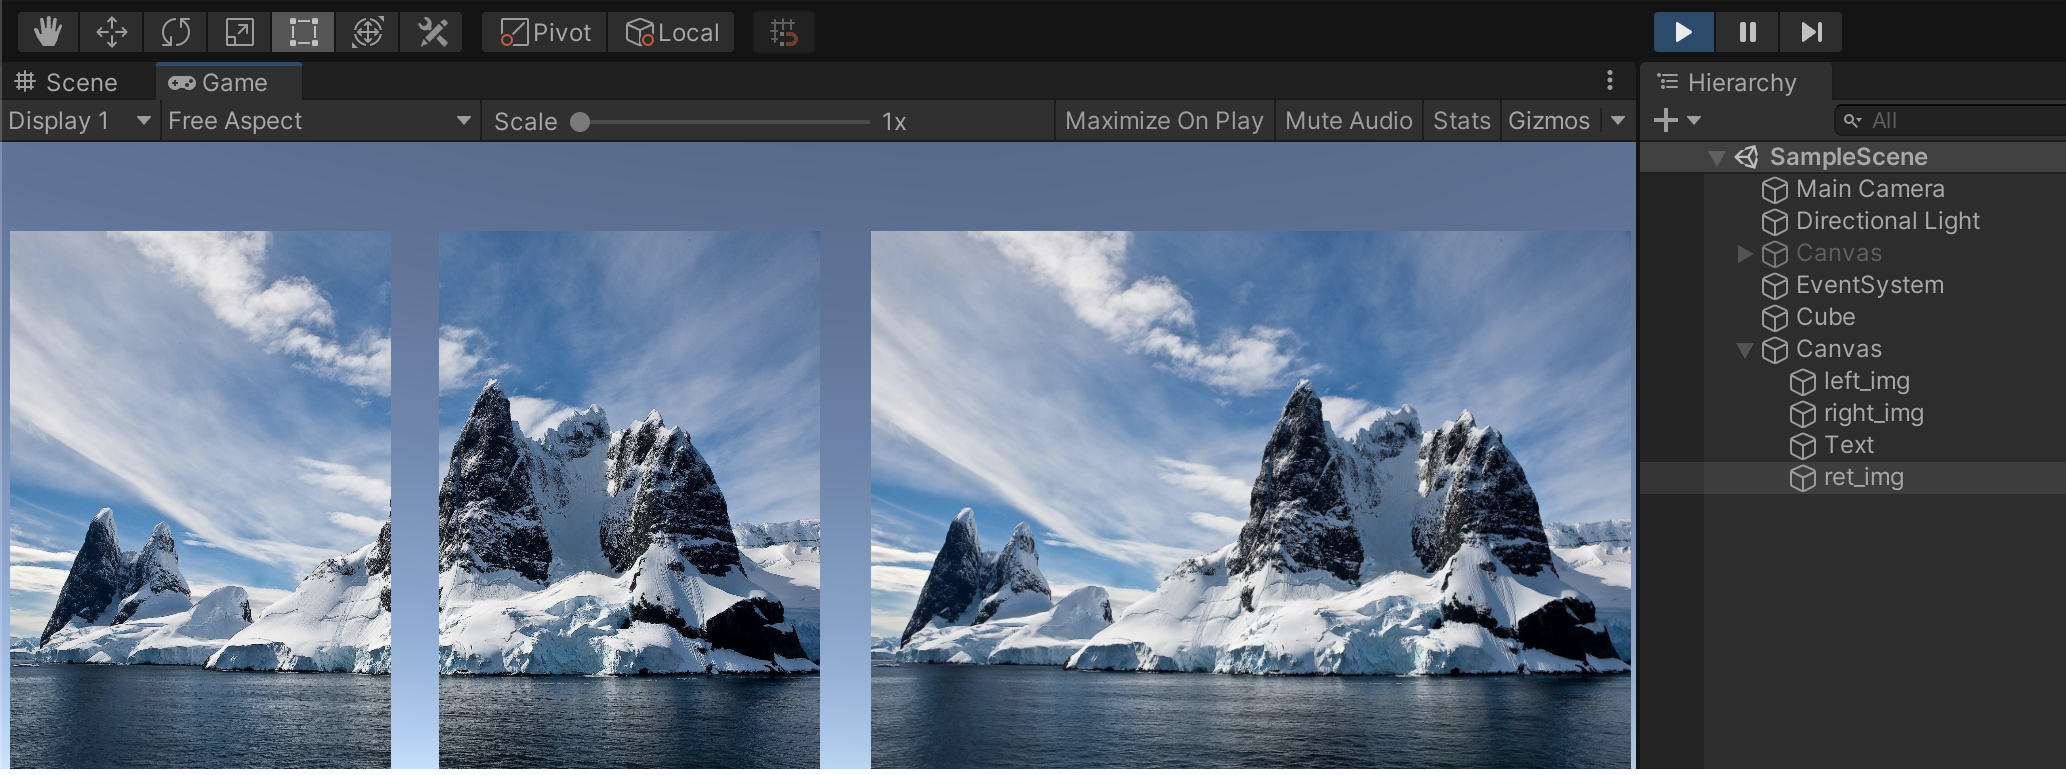
有了上面的示例,实现一个左右拼接就很简单了,就是读写像素
public static Texture2D mergeTexture(Texture2D left, Texture2D right)
{
    var ret = new Texture2D(left.width + right.width, right.height);

    for (int y = 0; y < left.height; y++)
    {
        for (int x = 0; x < left.width; x++)
        {
            ret.SetPixel(x, y, left.GetPixel(x, y));
        }
    }

    for (int y = 0; y < right.height; y++)
    {
        for (int x = 0; x < right.width; x++)
        {
            ret.SetPixel(x + left.width, y, right.GetPixel(x, y));
        }
    }
	Texture2D.Destroy(left);
	Texture2D.Destroy(right);
	left = null;
	right = null;
    ret.Apply();
    return ret;
}
注意点
1、用完的 texture 记得及时回收 Texture2D.Destroy(tex),避免内存泄漏;
2、Texture2D 的 Read/Write Enable 否则无法读取像素;
3、如果是需要保存到本地的话判断是否需要本地文件存储权限,并且确定是否需要刷新到相册,如非必要不要刷新到用户相册;
4、尽量按偶数像素来拼接,如果是NGUI,NGUI会自动把奇数宽高的图片补起成偶数的宽高图片,并且利用三线性来过滤图片拼接的时候可能会产生割裂的直线,这个时候需要将图片模式设置为点线性过滤模式;