Flink核心API进阶(二)
本篇文章主要学习Flink的核心API的进阶部分的笔记,包含自定义Source、自定义分区器、自定义Sink等都是经常会遇到的场景,另外介绍了Transformation 部分高级算子,从Flink Function 的宏观层级出发,通过实现顶层接口把自定义的功能交给Flink去执行,后续遇到了更复杂的自定义场景也会在本篇笔记中补充。
Flink Function 宏观层级
所有Flink函数类都有其Rich版本。它与常规函数的不同在于,可以获取运行环境的上下文,并拥有一些生命周期方法,所以可以实现更复杂的功能。也有意味着提供了更多的,更丰富的功能。
Rich Function有一个生命周期的概念,典型的生命周期方法有:
- open()方法是rich function的初始化方法,当一个算子例如map或者filter被调用之前open()会被调用
- close()方法是生命周期中的最后一个调用的方法,做一些清理工作
- getRuntimeContext()方法提供了函数的RuntimeContext的一些信息,例如函数执行的并行度,任务的名字,以及state状态
对于RichMapFunction来说,每条数据转换的时候都会调用一次map,而open的调用次数跟并行度相关,如果设置了并行度为2,那么就会调用两次,否则默认次数就是CPU核心数。
自定义Source
通过自定义Source的方式很容易产生一些模拟数据,在测试的时候非常有用,默认实现的SourceFunction并行度为1,而且也只能为1。在DataStreamSource中存在检查并行度的操作,源码如下:
@Override
public DataStreamSource<T> setParallelism(int parallelism) {
    OperatorValidationUtils.validateParallelism(parallelism, isParallel);
    super.setParallelism(parallelism);
    return this;
}

// OperatorValidationUtils.validateParallelism
public static void validateParallelism(int parallelism, boolean canBeParallel) {
    Preconditions.checkArgument(canBeParallel || parallelism == 1,
        "The parallelism of non parallel operator must be 1.");
    Preconditions.checkArgument(parallelism > 0 || parallelism == -1,
        "The parallelism of an operator must be at least 1, or ExecutionConfig.PARALLELISM_DEFAULT (use system default).");
}
实现一个我们自己的模拟数据AccessLogSource:
public class AccessLogSource implements SourceFunction<AccessLog> {
    boolean running = true;
    @Override
    public void run(SourceContext<AccessLog> ctx) throws Exception {
        String[] domains = {"cn.tim", "tim.com", "pk.com"};
        Random random = new Random();
        while (running) {
            for (int i = 0; i < 10; i++) {
                AccessLog accessLog = new AccessLog();
                accessLog.setTime(1234567L);
                accessLog.setDomain(domains[random.nextInt(domains.length)]);
                accessLog.setTraffic(random.nextDouble() + 1_000);
                ctx.collect(accessLog);
            }
            Thread.sleep(5_000);
        }
    }

    @Override
    public void cancel() {
        running = false;
    }
}


public class AccessLogSourceV2 implements ParallelSourceFunction<AccessLog> {
    ......
}

private static void test_source_01(StreamExecutionEnvironment env) {
    // DataStreamSource<AccessLog> source = env.addSource(new AccessLogSource());
    // DataStreamSource<AccessLog> source = env.addSource(new AccessLogSource()).setParallelism(2); error SourceFunction并行度为只能是1
    DataStreamSource<AccessLog> source = env.addSource(new AccessLogSourceV2()).setParallelism(2);
    System.out.println(source.getParallelism()); // 2
    source.print();
}
当我们对AccessLogSource设置除1以外的并行度的时候,由于DataStreamSource中存在检查并行度,则会报错,当需要实现并行度大于1的DataStreamSource的时候,去实现并行ParallelSourceFunction即可。
使用MySQL作为DataSource,下面是数据库的表结构和数据:
use pk_flink_01;

SET FOREIGN_KEY_CHECKS=0;

-- ----------------------------
-- Table structure for student
-- ----------------------------
DROP TABLE IF EXISTS `student`;
CREATE TABLE `student` (
  `id` int(11) NOT NULL AUTO_INCREMENT,
  `name` varchar(255) NOT NULL,
  `age` int(11) NOT NULL,
  PRIMARY KEY (`id`)
) ENGINE=InnoDB AUTO_INCREMENT=4 DEFAULT CHARSET=utf8;

-- ----------------------------
-- Records of student
-- ----------------------------
INSERT INTO `student` VALUES ('1', 'flink', '22');
INSERT INTO `student` VALUES ('2', 'hello', '23');
INSERT INTO `student` VALUES ('3', 'world', '38');
定义数据Bean:
public class Student {
    private Integer id;
    private String name;
    private Integer age;
    ...
}
定义MySQLUtils用于获取MySQL连接和关闭MySQL连接:
public class MySQLUtils {
    public static Connection getConnection() {
        try {
            Class.forName("com.mysql.cj.jdbc.Driver");
            return DriverManager.getConnection(
                    "jdbc:mysql://192.168.31.86:3307/pk_flink_01",
                    "root", "123456");
        } catch (Exception e) {
            e.printStackTrace();
        }
        return null;
    }

    public static void closeConnection(Connection connection,
                                       PreparedStatement preparedStatement) {
        if(preparedStatement != null) {
            try {
                preparedStatement.close();
            } catch (SQLException e) {
                e.printStackTrace();
            }
        }
        if(connection != null){
            try {
                connection.close();
            } catch (SQLException e) {
                e.printStackTrace();
            }
        }
    }
}
定义StudentSource作为数据源:
public class StudentSource extends RichSourceFunction<Student> {
    Connection connection;
    PreparedStatement preparedStatement;

    @Override
    public void run(SourceContext ctx) throws Exception {
        ResultSet resultSet = preparedStatement.executeQuery();
        while (resultSet.next()){
            int id = resultSet.getInt("id");
            String name = resultSet.getString("name");
            int age = resultSet.getInt("age");
            ctx.collect(new Student(id, name, age));
        }
    }

    @Override
    public void cancel() {

    }

    @Override
    public void open(Configuration parameters) throws Exception {
        super.open(parameters);
        connection = MySQLUtils.getConnection();
        if(connection != null) {
            preparedStatement = connection.prepareStatement("select * from student");
        }
    }

    @Override
    public void close() throws Exception {
        super.close();
        MySQLUtils.closeConnection(connection, preparedStatement);
    }
}
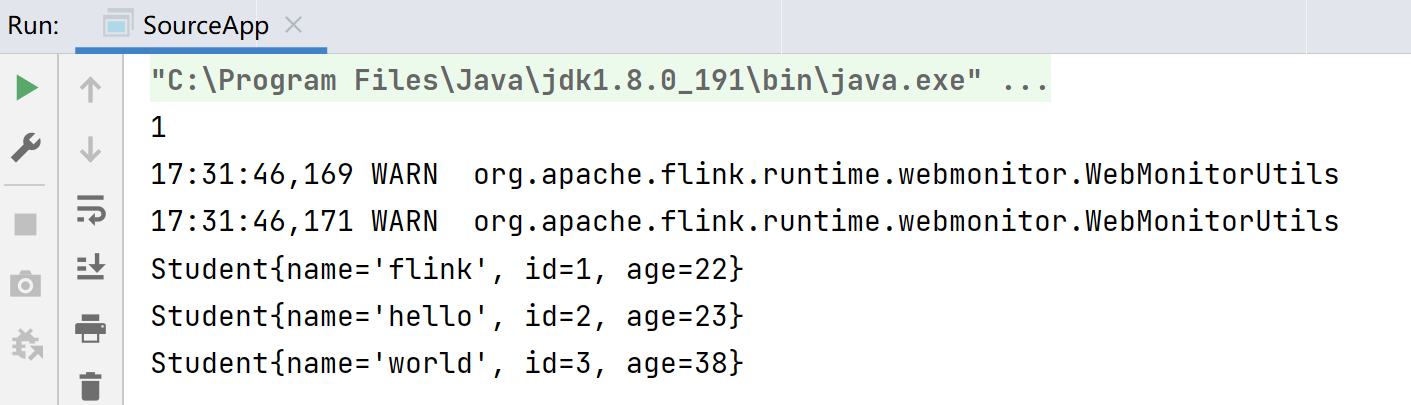
现在使用StudentSource测试一下自定义MySQLSource:
private static void test_source_mysql(StreamExecutionEnvironment env) {
    DataStreamSource<Student> source = env.addSource(new StudentSource());
    System.out.println(source.getParallelism());
    source.print().setParallelism(1);
}
同理自定义Source从其他的数据库、文件、MQ、Socket都是一样的操作。
Transformation 高级算子
Union
这个算子也是官方文档里有介绍:将两个或多个数据流合并,创建一个包含所有数据流中的所有元素的新数据流。如果将一个数据流与它本身结合,将得到结果流中的每个元素两次:
就拿上面的MySQL DataSource为例:
DataStreamSource<Student> source = env.addSource(new StudentSource());
source.union(source).print();

// ------- 输出 -----------
11> Student{name='world', id=3, age=38}
7> Student{name='flink', id=1, age=22}
8> Student{name='hello', id=2, age=23}
9> Student{name='hello', id=2, age=23}
10> Student{name='world', id=3, age=38}
6> Student{name='flink', id=1, age=22}

Process finished with exit code 0
需要注意的是Union做多流合并的时候需要数据结构必须相同。
CoMap
CoMap与CoFlatMap类似于StreamDataSource的Map与FlatMap,只不过它们适用于 connected data stream,不同的DataSource将使用不同的处理器来处理,比如一个Source是上面的MySQL、一个是Socket:
public static void test_coMap(StreamExecutionEnvironment env){
    // String类型
    DataStreamSource<String> source1 = env.socketTextStream("192.168.31.86", 9527);
    // Student类型
    DataStreamSource<Student> source2 = env.addSource(new StudentSource());
    // 将两个流连接在一起
    ConnectedStreams<String, Student> connect = source1.connect(source2);
    // source1的类型、source2的类型、返回值的类型
    connect.map(new CoMapFunction<String, Student, String>() {
        // 处理第一个流的业务逻辑
        @Override
        public String map1(String value) throws Exception {
            return value + "-CoMap";
        }
        // 处理第二个流的业务逻辑
        @Override
        public String map2(Student value) throws Exception {
            return value.getName();
        }
    }).print();
}

// --------------------
4> world
2> flink
3> hello
2> hello-CoMap
3> 999 888-CoMap
CoFlatMap
public static void test_coFlatMap(StreamExecutionEnvironment env){
    DataStreamSource<String> source1 = env.fromElements("a b c", "d e f");
    DataStreamSource<String> source2 = env.fromElements("1,2,3", "4,5,6");
    ConnectedStreams<String, String> connect = source1.connect(source2);
    connect.flatMap(new CoFlatMapFunction<String, String, String>() {
        @Override
        public void flatMap1(String value, Collector<String> out) throws Exception {
            String[] split = value.split(" ");
            for(String s: split) {
                out.collect(s);
            }
        }

        @Override
        public void flatMap2(String value, Collector<String> out) throws Exception {
            String[] split = value.split(",");
            for(String s: split) {
                out.collect(s);
            }
        }
    }).print();
}

// ----------------------
8> d
6> 4
7> a
6> 5
8> e
5> 1
8> f
6> 6
7> b
5> 2
7> c
5> 3

Process finished with exit code 0
自定义分区器
AccessLogSourceV2这恶鬼DataSource产生的AccessLog对象包含了"cn.tim", "tim.com", "pk.com"等三种域名,现在假设需要对这些数据进行分区操作:
public class AccessLogSourceV2 implements ParallelSourceFunction<AccessLog> {
    boolean running = true;
    @Override
    public void run(SourceContext<AccessLog> ctx) throws Exception {
        String[] domains = {"cn.tim", "tim.com", "pk.com"};
        Random random = new Random();
        while (running) {
            for (int i = 0; i < 10; i++) {
                AccessLog accessLog = new AccessLog();
                accessLog.setTime(1234567L);
                accessLog.setDomain(domains[random.nextInt(domains.length)]);
                accessLog.setTraffic(random.nextDouble() + 1_000);
                ctx.collect(accessLog);
            }

            Thread.sleep(5_000);
        }
    }

    @Override
    public void cancel() {
        running = false;
    }
}
首先定义分区器 PkPartitioner.java:
import org.apache.flink.api.common.functions.Partitioner;
public class PkPartitioner implements Partitioner<String> {
	// 根据key分成三个区
    @Override
    public int partition(String key, int numPartitions) {
        System.out.println("numPartitions = " + numPartitions);
        if("cn.tim".equals(key)){
            return 0;
        }else if("tim.com".equals(key)){
            return 1;
        }else {
            return 2;
        }
    }
}
使用分区器:
StreamExecutionEnvironment env = StreamExecutionEnvironment.getExecutionEnvironment();
env.setParallelism(3);
DataStreamSource<AccessLog> source = env.addSource(new AccessLogSourceV2());

source.map(new MapFunction<AccessLog, Tuple2<String, AccessLog>>() {
    @Override
    public Tuple2<String, AccessLog> map(AccessLog value) throws Exception {
        return Tuple2.of(value.getDomain(), value);
    }
})
    .partitionCustom(new PkPartitioner(), 0)
    .map(new MapFunction<Tuple2<String, AccessLog>, AccessLog>() {
        @Override
        public AccessLog map(Tuple2<String, AccessLog> value) throws Exception {
            System.out.println("current thread id is:" + Thread.currentThread().getId() + ", value is " + value.f1);
            return value.f1;
        }
    }).print();
env.execute("PartitionerApp");

使用分区器可以让我们可以根据数据中某些属性划分,分别划给对应的子任务来处理数据。
自定义Sink
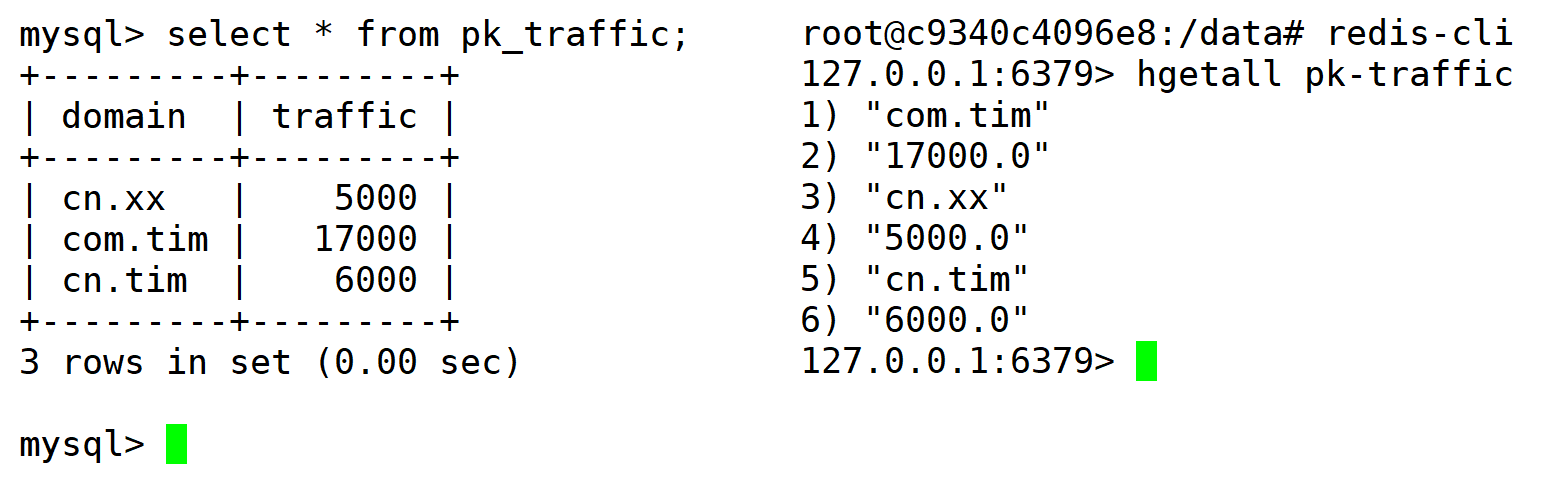
除了Flink本身自带的Sink,我们也可以实现自己的Sink用户数据写回,现在假设需要把数据写回到MySQL。以请求域名统计为例,我们最终要存储的数据是每个域名访问的时长总和:
-- ----------------------------
-- Table structure for pk_traffic
-- ----------------------------
DROP TABLE IF EXISTS `pk_traffic`;
CREATE TABLE `pk_traffic` (
  `domain` varchar(255) NOT NULL,
  `traffic` double NOT NULL
) ENGINE=InnoDB DEFAULT CHARSET=utf8;
这样就会有两种情况,其实每计算一次需要判断是否已经存在表中,如果存在就更新数据,如果不存在就插入数据
PkMySQLSink.java 就是我们自定义的用于把数据写回到MySQL中的Sink:
/**
 * domain - traffic
 */
public class PkMySQLSink extends RichSinkFunction<Tuple2<String, Double>> {
    Connection connection;

    PreparedStatement insertPst;
    PreparedStatement updatePst;

    @Override
    public void open(Configuration parameters) throws Exception {
        super.open(parameters);

        connection = MySQLUtils.getConnection();
        if(connection == null) throw new RuntimeException("MySQL link failed!");
        insertPst = connection.prepareStatement("insert into pk_traffic(domain, traffic) values (?,?)");
        updatePst = connection.prepareStatement("update pk_traffic set traffic = ? where domain = ?");
    }

    @Override
    public void close() throws Exception {
        super.close();
        if(insertPst != null) insertPst.close();
        if(updatePst != null) updatePst.close();
        if(connection != null) connection.close();
    }

    @Override
    public void invoke(Tuple2<String, Double> value, Context context) throws Exception {
        System.out.println("===========invoke==========" + value.f0 + "--->" + value.f1);
        updatePst.setDouble(1, value.f1);
        updatePst.setString(2, value.f0);
        updatePst.execute();

       if(updatePst.getUpdateCount() == 0){
           insertPst.setString(1, value.f0);
           insertPst.setDouble(2, value.f1);
           insertPst.execute();
       }
    }
}
使用该Sink完成数据写回MySQL的功能:
public static void toMySQL(StreamExecutionEnvironment env){
    DataStreamSource<String> source = env.readTextFile("data/access.log");
    SingleOutputStreamOperator<AccessLog> map = source.map((MapFunction<String, AccessLog>) s -> {
        String[] split = s.trim().split(",");
        if (split.length < 3) return null;
        Long time = Long.parseLong(split[0]);
        String domain = split[1];
        Double traffic = Double.parseDouble(split[2]);
        return new AccessLog(time, domain, traffic);
    });

    SingleOutputStreamOperator<AccessLog> traffic = map.keyBy((KeySelector<AccessLog, String>)
                                                              AccessLog::getDomain).sum("traffic");
    traffic.print();

    // 数据写回 MySQL
    traffic.map(new MapFunction<AccessLog, Tuple2<String, Double>>() {
        @Override
        public Tuple2<String, Double> map(AccessLog value) throws Exception {
            return Tuple2.of(value.getDomain(), value.getTraffic());
        }
    }).addSink(new PkMySQLSink());
}
每条数据都会调用invoke方法,这样的话每次数据变更都会把计算结果写回MySQL,不过在数据量比较大的情况下肯定不能每次每次数据变更都把计算结果写回MySQL,这个时候就需要用到Window机制了。
注意这几个函数的调用次数与时机,open是rich function的初始化方法,像invoke则会每条数据都调用一次。
下面来看看如何把数据写回Redis,其实和MySQL是大同小异的。
https://bahir.apache.org/docs/flink/current/flink-streaming-redis/
首先引入依赖 pom.xml:
<dependency>
    <groupId>org.apache.bahir</groupId>
    <artifactId>flink-connector-redis_2.11</artifactId>
    <version>1.0</version>
</dependency>
实现写入Redis的Sink —— PkRedisSink.java
public class PkRedisSink implements RedisMapper<Tuple2<String, Double>> {
    @Override
    public RedisCommandDescription getCommandDescription() {
        return new RedisCommandDescription(RedisCommand.HSET, "pk-traffic");
    }

    @Override
    public String getKeyFromData(Tuple2<String, Double> data) {
        return data.f0;
    }

    @Override
    public String getValueFromData(Tuple2<String, Double> data) {
        return data.f1 + "";
    }
}
使用和PkMySQLSink一样,直接替换掉PkMySQLSink即可!
......
//.addSink(new PkMySQLSink());
.addSink(new RedisSink<Tuple2<String, Double>>(conf, new PkRedisSink()));