MyBatis(一)
MyBatis简介
首先说一下MyBatis是什么?MyBatis就是下图中的鸟,哈哈!
 MyBatis是一款优秀的持久层框架,它支持定制化SQL、存储过程以及高级映射。MyBatis避免了几乎所有的JDBC代码和手动设首参数以及获取结果集。MyBatis可以使用简单的XML或注解来配罝和映射原生信息,将接口和Java的POJOs(Plain Old Java Objects,普通的Java对象)映射成数据库中的记录
MyBatis和Hibernate一样,是一个ROM框架(Object Relational Mapping,是对象到关系的映射,是一种解决实体对象与关系型数据库相互匹配的技术,它的实现思想就是将数据库中数据表映射成为对象,对关系型数据以对象的形式进行操作。在软件开发中,对象和关系数据是业务实体的两种表现形式,ORM通过使用描述对象和数据库之间映射的元数据,将对象自动持久化到关系数据库中。
MyBatis相对于Hibernate来说更加轻量级,所以MyBatis其实不具备像Hibernate那样自动建表的功能,但是MyBatis现在对我来说足够用了,现在开始记录一下学习MyBatis过程中遇到的问题或者MyBatis的知识点!
从HelloWorld开始
下面从MyBatis的helloworld说起,如何开始学习MyBatis: 首先是MyBatis的官方网站,这里具有最齐全的MyBatis文档,关键是居然有中文版的!?!?http://www.mybatis.org/mybatis-3/zh/d4c0f50720a538647399fc1363896cce.html 另外,这个文档有PDF版本的,可以在网上下载到,如果你希望使用离线版的文档去下载这个PDF即可!
这个是MyBatis的maven依赖,如果没学过maven也不要紧,可以参考我的一片博客《一文读懂Maven》,题目有点夸张,大家将就着看吧!如果你不希望使用maven的话直接导入jar包就好了,MyBatis只有一个jar包(但是不要忘记mysql驱动程序的jar包)!
<dependency>
  <groupId>org.mybatis</groupId>
  <artifactId>mybatis</artifactId>
  <version>x.x.x</version>
</dependency>
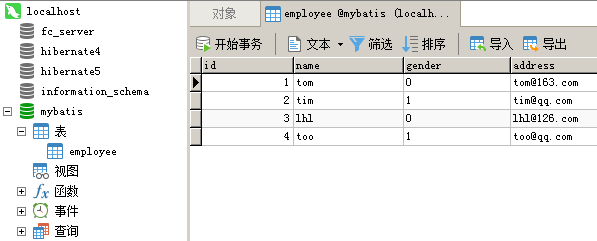
我就演示一下非maven版本的HelloWorld,首先准备一个数据库和表,如图:
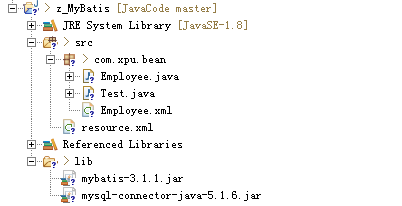
 这是我整个工程的目录结构:
 resource.xml
<?xml version="1.0" encoding="UTF-8"?>

<!DOCTYPE configuration
PUBLIC "-//mybatis.org//DTD Config 3.0//EN"
"http://mybatis.org/dtd/mybatis-3-config.dtd">
<configuration>
	<environments default="development">
		<environment id="development">
			<transactionManager type="JDBC" />
			<dataSource type="POOLED">
				<property name="driver" value="com.mysql.jdbc.Driver" />
				<property name="url" value="jdbc:mysql://127.0.0.1:3306/mybatis" />
				<property name="username" value="root" />
				<property name="password" value="1234" />
			</dataSource>
		</environment>
	</environments>
	<mappers>
		<mapper resource="com/xpu/bean/Employee.xml" />
	</mappers>

</configuration>
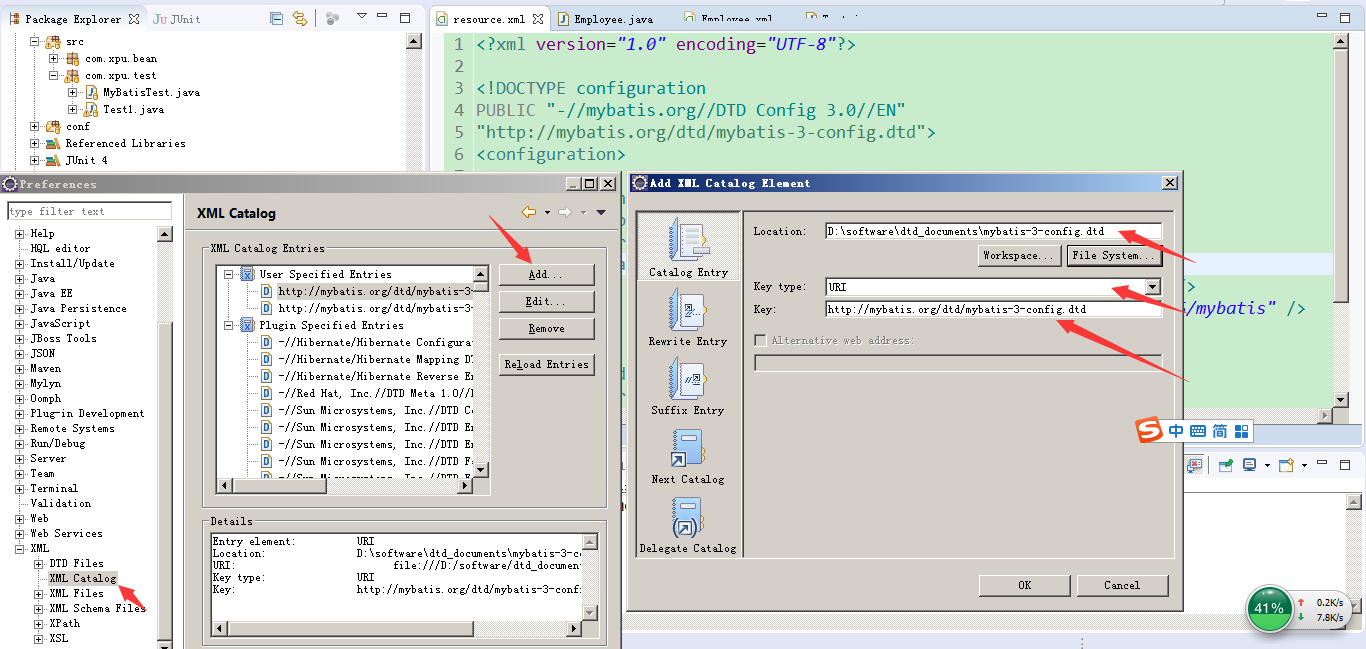
dataSource 标签配置的数据库连接的基本信息,mappers标签配置的是对象映射关系文件,说一下关于引入dtd约束文档的问题,如果未配置dtd约束文档,那么eclipse是没有提示的,你可以在Window—>Preference–>XML—>XMLCatalog里面配置dtd,点击Add,选择URL,填入dtd的URL,选择FileSystem点击打开下载好的dtd文件即可!
 接着创建一个JavaBean:
package com.xpu.bean;

public class Employee {
	private Integer id;
	private String name;
	private char gender;
	private String address;
	public Employee() {
		super();
	}
	public Employee(Integer id, String name, char gender, String address) {
		super();
		this.id = id;
		this.name = name;
		this.gender = gender;
		this.address = address;
	}
	public Integer getId() {...}
	public void setId(Integer id) {...}
	public String getName() {...}
	public void setName(String name) {...}
	public char getGender() {...}
	public void setGender(char gender) {...}
	public String getAddress() {...}
	public void setAddress(String address) {...}
	@Override
	public String toString() {...}
}
创建关系映射文件employee.xml,注意namespace必须和JavaBean一一对应,sql查询语句不要写错,id是要传入的一个参数:
<?xml version="1.0" encoding="UTF-8" ?>
<!DOCTYPE mapper
PUBLIC "-//mybatis.org//DTD Mapper 3.0//EN"
"http://mybatis.org/dtd/mybatis-3-mapper.dtd">
<mapper namespace="com.xpu.bean.Employee">
	<select id="selOne" parameterType="java.lang.String" resultType="com.xpu.bean.Employee">
		select * from employee where id = #{id}
	</select>
</mapper>
Test.java
package com.xpu.bean;

import java.io.IOException;
import java.io.Reader;

import org.apache.ibatis.io.Resources;
import org.apache.ibatis.session.SqlSession;
import org.apache.ibatis.session.SqlSessionFactory;
import org.apache.ibatis.session.SqlSessionFactoryBuilder;

public class Test {
	public static void main(String[] args) throws IOException {
		//通过resource.xml中的配置信息获取一个SqlSessionFactory对象
		Reader reader = Resources.getResourceAsReader("resource.xml");
		SqlSessionFactory sqlSessionFty = new SqlSessionFactoryBuilder().build(reader);

		//开始一个会话
		SqlSession sqlSession = sqlSessionFty.openSession();

		//执行查询方法
		Employee one = sqlSession.selectOne("com.xpu.bean.Employee.selOne", "1");
		System.out.println(one);

		//关闭会话
		sqlSession.close();
	}
}
 这便查询到了ID为1的用户,HelloWorld的演示到此结束!
MyBatis的开发模式
1、配置文件
resource.xml
<mappers>
	<mapper resource="com/xpu/bean/Employee.xml" />
</mappers>
Employee.xml
<mapper namespace="com.xpu.bean.Employee">
	<select id="selOne" parameterType="java.lang.String" resultType="com.xpu.bean.Employee">
		select * from employee where id = #{id}
	</select>
</mapper>
这样的方式就是我的HelloWorld中所用到的方式,Employee.xml的namespace是我的JavaBean,执行查询的时候需要使用如下方式,selOne是select标签的id,parameterType代表参数的类型,resultType代表返回值的类型,中间是sql查询语句!
//执行查询方法
Employee one = sqlSession.selectOne("com.xpu.bean.Employee.selOne", "1");
2、接口
IEmployeeDao.java
public interface IEmployeeDao {
	//查询所有记录
	@Select("select * from employee")
	public List<Employee> getAll();
}
resource.xml
<mappers>
	<mapper class="com.xpu.dao.IEmployeeDao"/>
</mappers>
使用该模式测试:
package com.xpu.dao;

import java.io.IOException;
import java.io.Reader;
import java.util.List;

import org.apache.ibatis.io.Resources;
import org.apache.ibatis.session.SqlSession;
import org.apache.ibatis.session.SqlSessionFactory;
import org.apache.ibatis.session.SqlSessionFactoryBuilder;

import com.xpu.bean.Employee;

public class Test {
	public static void main(String[] args) throws IOException {
		Reader reader = Resources.getResourceAsReader("resource.xml");
		SqlSessionFactory factory = new SqlSessionFactoryBuilder().build(reader);

		//true表示是否自动提交,默认值是false
		SqlSession session = factory.openSession(true);

		IEmployeeDao mapper = session.getMapper(IEmployeeDao.class);
		List<Employee> all = mapper.getAll();
		for (Employee employee : all) {
			System.out.println(employee);
		}
	}
}
3、接口+配置文件
这种模式是最常用的模式: Employee.xml:
<mapper namespace="com.xpu.dao.IEmployeeDao">
	<select id="getAll" resultType="com.xpu.bean.Employee">
	    select * from employee
	</select>

	<select id="getOne" resultType="com.xpu.bean.Employee">
	    select * from employee where id = #{id}
	</select>
</mapper>
resource.xml
<mappers>
	<mapper resource="com/xpu/bean/Employee.xml" />
</mappers>
IEmployeeDao.java
package com.xpu.dao;
public interface IEmployeeDao {

	public List<Employee> getAll();

	public Employee getOne(String id);
}
以上就是MyBatis的三种开发模式,第三种用的比较多,第一种局限性较大,第二种耦合度太强,开发本来的原则就是高内聚、低耦合,使用第二种方式反倒是的耦合度增强不宜使用,所以常用的方式就是第三种开发模式!
下面对需要注意的地方总结一下,参数类型的配置要写全路径名称,避免出错,使用第二种开发模式的时候,需要将接口配置成class,定义返回值类型的时候注意,虽然getAll返回的是一个List集合,但是集合中装的还是对象,所以我们在配置返回值的时候还是需要配置成Employee类:
<mapper class="com.xpu.dao.IEmployeeDao"/>
最后说一个比较重要的问题,为什么我们通过IEmployeeDao.class对象得到的mapper对象是一个实例呢?我们并没有实现接口呀?没有实现接口的话为什么可以拿到他的实现类对象呢?
这是其实是个代理对象,是通过动态代理来实现的,具体参考Proxy类,看看如何通过动态代理生成代理对象,具体可以参考 《Mybatis是如何通过mapper接口生成代理对象的》
MyBatis的CURD
MyBatis最核心的作用还是增删改查嘛,接下来我通过第三种开发模式总结一下MyBatis的CURD,看看Employee.xml中的SQL语句:
<?xml version="1.0" encoding="UTF-8" ?>
<!DOCTYPE mapper
PUBLIC "-//mybatis.org//DTD Mapper 3.0//EN"
"http://mybatis.org/dtd/mybatis-3-mapper.dtd">
<mapper namespace="com.xpu.dao.EmployeeDao">

    <select id="selAll" resultType="com.xpu.bean.Employee">
        select * from employee
    </select>

	<select id="selOne" parameterType="java.lang.String" resultType="com.xpu.bean.Employee">
	    select * from employee where id = #{id}
	</select>

	<insert id="insertEmp" parameterType="com.xpu.bean.Employee">
	    insert into employee values(#{id}, #{name}, #{gender}, #{address})
	</insert>

	<update id="updateEmp" parameterType="com.xpu.bean.Employee">
	    update employee set name = #{name}, address = #{address} where id = #{id}
	</update>

	<delete id="daleteEmp">
	    delete from employee where id = #{id}
	</delete>
</mapper>
IEmployeeDao.java
public interface EmployeeDao {
	//查询所有
	public List<Employee> selAll();

	//查询单一
	public Employee selOne(String id);

	//新增
	public void insertEmp(Employee emp);

	//修改
	public void updateEmp(Employee emp);

	//删除
	public void daleteEmp(String id);
}
测试代码:
public class Demo {
	public static void main(String[] args) throws IOException{
		Reader reader = Resources.getResourceAsReader("resource.xml");
		SqlSessionFactory sessionFactory = new SqlSessionFactoryBuilder().build(reader);
		SqlSession session = sessionFactory.openSession();

		IEmployeeDao mapper = session.getMapper(IEmployeeDao.class);
		mapper.insertEmp(new Employee(5, "Lucy", '1', "Lucy@163.com"));
		mapper.daleteEmp("4");
		mapper.updateEmp(new Employee(5, "Lucy", '1', "Lucy@qq.com"));
		System.out.println(mapper.selOne("2"));
		session.commit();
		session.close();
	}
}
MyBatis的传参
1、出错演示
好了,增删查改的基本功能已经演示完毕,但是假设我们需要做一个多条件查询的方法,则需要这样写(一下代码均为省略代码,只贴上了重要的代码,其他的代码均在CURD的演示中): Employee.xml
<select id="queryList" resultType="com.xpu.bean.Employee">
	    select * from employee where name like '#{name}%' and gender = #{gender}
</select>
IEmployeeDao.java
//多条件查询
public List<Employee> queryList(String name, char gender);
多条件查询测试:
public void test() {
		IEmployeeDao mapper = session.getMapper(IEmployeeDao.class);
		List<Employee> list = mapper.queryList("t", '1');
		for (Employee employee : list) {
			System.out.println(employee);
		}
}
但是却报错了,注意红线标记的地方,我们需要修改参数的传递方式:

2、顺序传参法
其实对于这种多参数的情况,应该这样写Employee.xml,这叫做顺序传参法:
<select id="queryList" resultType="com.xpu.bean.Employee">
	    select * from employee where name like '${param1}%' and gender = #{param2}
	    select * from employee where name = #{0} and gender = #{1}
</select>
#{ }里面的数字代表你传入参数的顺序,SQL语句的语义表达不直观,且一旦顺序调整容易出错,所以不建议使用!
3、注解传参法
但是这样写的可读性太差,可以使用注解的方式:
<select id="queryList" resultType="com.xpu.bean.Employee">
	select * from employee where name like '${name}%' and gender = #{gender}
</select>
//多条件查询
public List<Employee> queryList(@Param("name") String name, @Param("gender") char gender);
这样可读性强,而且不会因为参数的顺序问题导致程序异常!
4、Map传参法
Employee.xml
<select id="queryList" resultType="com.xpu.bean.Employee">
	select * from employee where name like '${name}%' and gender = #{gender}
<select>
IEmployeeDao.java
public List<Employee> queryList(Map map);
测试代码:
public void test() {
		IEmployeeDao mapper = session.getMapper(IEmployeeDao.class);
		Map map = new HashMap();
		map.put("name", "t");
		map.put("gender", '1');
		List<Employee> list = mapper.queryList(map);
}
5、JavaBean传参法
这个在MyBatis的CURD中已经演示过了,resultType="com.xpu.bean.Employee" ,通过#{ 对象属性 } 便可以传参,在此不再赘述!
MyBatis动态SQL
MyBatis 的强大特性之一便是它的动态 SQL。你可以在这个网站学习动态SQL 《动态 SQL》 ,如果你有使用 JDBC 或其他类似框架的经验,你就能体会到根据不同条件拼接 SQL 语句有多么痛苦。拼接的时候要确保不能忘了必要的空格,还要注意省掉列名列表最后的逗号。利用动态 SQL 这一特性可以彻底摆脱这种痛苦。
if
就是简单的条件判断,利用if语句我们可以实现某些简单的条件选择
<!-- 动态SQL -->
	<select id="queryByIf" resultType="com.xpu.bean.Employee">
		select * from employee where 1=1
		<if test="name != null">
			and name like '${name}%'
		</if>
	</select>
但是在上面的例子中,如果name为空的话,where后面就什么都没有,所以加上1=1完全是为了保证语法的正确性,这个问题将在下面解决!
where+if
where标签知道如果它包含的标签中有返回值的话,它就插入一个where。此外,如果标签返回的内容是以AND 或 OR开头的,则它会剔除掉。
<select id="queryByWhere" resultType="com.xpu.bean.Employee">
		select * from employee
		<where>
			<if test="name != null">
				name like '${name}%'
			</if>
			<if test="address != null">
				and address = #{address}
			</if>
		</where>
</select>
上述例子中,如果name不为空,address不为空,则SQL语句是select * from employee where name like '${name}%' and address = #{address} ,即使name为空,address前面的and也会被去掉,同样是合法的SQL语句,如果都为空,那就变成了查询所有记录,同样也是合法的SQL语句!
trim
trim标签是可以让我们自己去实现一个where标签,或者实现更多的功能,下面用trim标签去实现一个where标签:
<select id="queryByTrim" resultType="com.xpu.bean.Employee">
		select * from employee
		<trim prefix="where" prefixOverrides="AND | OR">
			<if test="name != null">
				name like '${name}%'
			</if>
			<if test="address != null">
				and address = #{address}
			</if>
		</trim>
	</select>
这个trim标签其实就是一个可以通过自定义属性去完成一些功能的标签,prefix="where" 就是代表如果标签中有内容则加上where,如果where后面直接遇到AND或者OR这样的标签就会将其剔除!
set
<update id="updateEmployee" parameterType="com.xpu.bean.Employee">
        update user
        <set>
            <if test="name!=null">
                    name=#{name}
            </if>
        </set>
        <where>
            <if test="address!=null">
                    address=#{address}
            </if>
        </where>
</update>
set标签代替了sql中set关键字,set标签可以自动去除sql中的多余的',',这个和where标签是一样的道理,同样的我们可以使用trim来实现同样的功能:
	<update id="updateEmployee" parameterType="com.xpu.bean.Employee">
        update user
        <trim prefix="set" prefixOverrides=",">
            <if test="name!=null">
                    name=#{name}
            </if>
        </trim>
        <where>
            <if test="address!=null">
                    address=#{address}
            </if>
        </where>
	</update>
choose
chose标签类似于流程控制中switch case default语句,配合when、otherwise标签使用:
<select id="queryByChoose" resultType="com.xpu.bean.Employee">
		select * from employee where 1=1
		<choose>
			<when test="name != null">
				and name like '${name}%'
			</when>
			<when test="address != null">
				and address = ${address}
			</when>
			<otherwise>
				order by name
			</otherwise>
		</choose>
	</select>
foreach
foreach标签可迭代任何对象(如列表、集合等)和任何的字典或者数组对象传递给foreach作为集合参数,下面是一个根据ID批量删除的示例:
<delete id="deleteByList">
		delete from employee where id in
		<foreach collection="list" open="(" separator="," close=")"
			item="myitem">
			#{myitem}
		</foreach>
</delete>

<delete id="deleteByArray">
		delete from employee where id in
		<foreach collection="array" open="(" separator="," close=")"
			item="myitem">
			#{myitem}
		</foreach>
</delete>
//批量删除
public Integer deleteByList(List<String> list);

//批量删除
public Integer deleteByArray(String[] strs);
public void func() throws IOException {
		Integer array = mapper.deleteByArray(new String[] {"1", "2"});
		System.out.println("影响行数:" + array);

		List<String> list = new ArrayList<>();
		list.add("3");
		list.add("4");

		Integer deleteByList = mapper.deleteByList(list);
		System.out.println("影响行数:" + deleteByList);
		session.commit();
		session.close();
	}
动态 SQL 语句的编写往往就是一个拼接的问题,为了保证拼接准确,我们最好首先要写原生的 SQL 语句出来,然后在通过 MyBatis 动态SQL 对照着改,防止出错!