PyTinyRenderer软渲染器-05
到目前为止,我们已经成功地实现了一些基本的三维渲染功能。我们从最基础的模型加载开始,接着实现了线段绘制,然后进行了三角形光栅化,涉及了平面着色、光照模型与背面剔除。还使用了Z-Buffer算法处理了隐藏面消除问题,以及成功地将纹理贴在了模型上。使用了三种着色方法——Flat Shading、Gouraud Shading、Phong Shading进行了片元着色。已经对渲染流程有了一个大致的理解。但是,随着我们不断地添加新的功能,我们的代码变得越来越复杂。为了使其更加模块化,更易于理解和扩展。我们将会把相关的功能进行归类,将复杂的功能分解为更小的、更易于管理的部分,为我们接下来的章节打好基础。
关于Z-Buffer的小问题
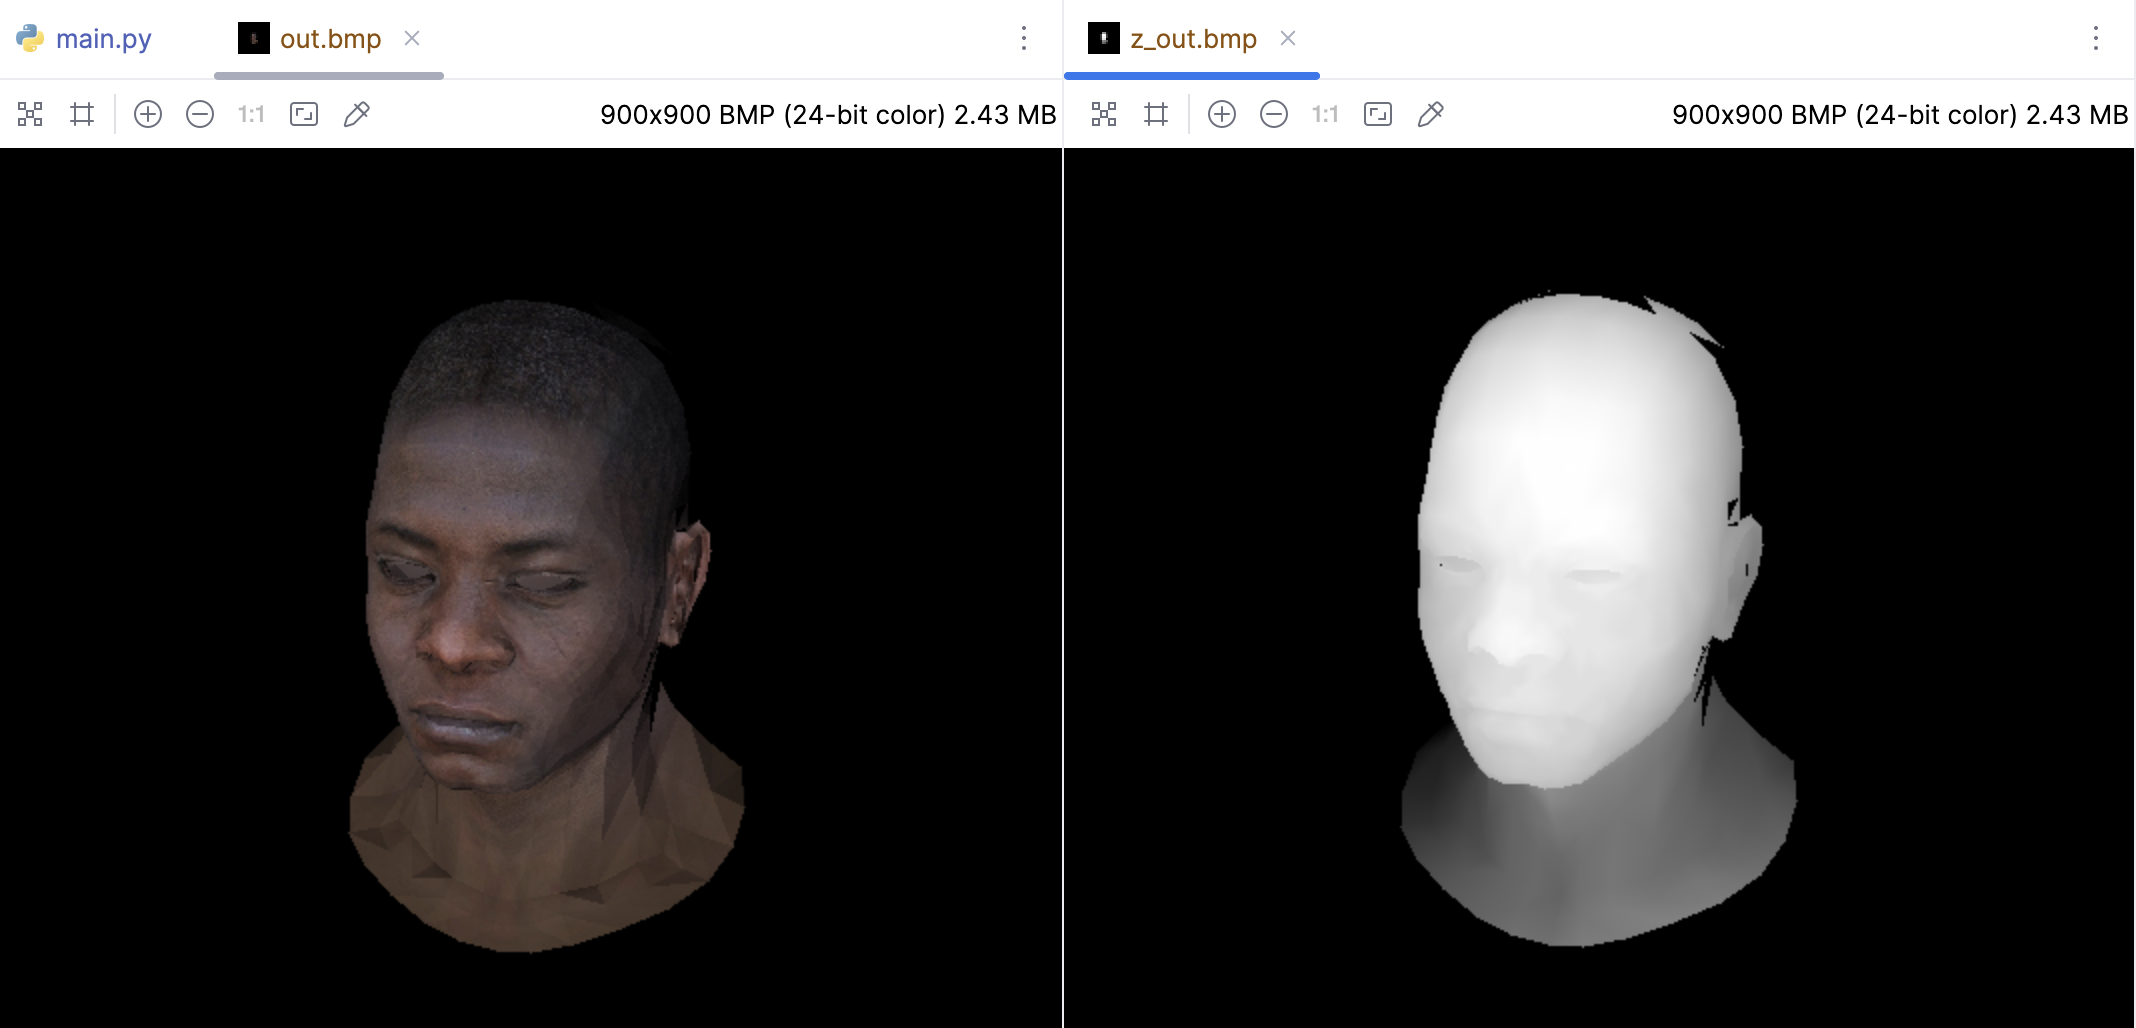
在这之前我们注意一个小问题,深度值z是在三维空间中计算的,它的范围可能远大于255,也可能有负值。这可能导致深度图在颜色上没有明显的变化。
所以正确的做法是先找到z值的最大和最小值,然后将这个范围映射到0到255的范围。这样,深度图就会有更明显的深度变化。于是我们可以在渲染结束后,遍历一遍Z-buffer,找到最大和最小的深度值,然后用这两个值来做归一化。另外需要移除 -sys.maxsize - 1 的值。这是因为这个值是初始化Z-buffer的时候设定的,它代表的是无穷远的深度。在计算最大和最小深度值时,不应该考虑这个值。
因为相机通常位于原点,而场景则位于Z轴的负方向。因此,一个物体离相机越远,它的Z值就越小(也就是说,更负)。在进行归一化和映射到0-255的范围时,需要确保正确处理这些负数,于是可以先将Z值偏移,使其变为正数,然后再进行归一化和映射。
z_image = MyImage((width, height))

# -sys.maxsize - 1 最小值
z_buffer = [-sys.maxsize - 1] * width * height

# 在所有三角形都被渲染后,遍历Z-buffer以找到最大和最小的深度值
z_min = min(z for z in z_buffer if z != -sys.maxsize - 1)
z_max = max(z for z in z_buffer if z != -sys.maxsize - 1)

# 然后,遍历Z-buffer,对每个深度值进行归一化,然后将其映射到0到255的范围
for i in range(len(z_buffer)):
    if z_buffer[i] != -sys.maxsize - 1:
        # 首先将Z值偏移,使其变为正数
        z_positive = z_buffer[i] - z_min
        # 然后归一化深度值
        z_normalized = z_positive / (z_max - z_min)
        # 映射到0到255的范围
        depth_color = int(z_normalized * 255)
        # 在深度图中设置像素颜色
        x = i % width
        y = i // width
        z_img.putpixel((x, y), (depth_color, depth_color, depth_color))

z_image.save('z_out.bmp')
项目代码重构
在TinyRenderer项目中,作者首先提醒我们不要直接使用他的代码,而应该自己动手编写。实现顶点和片元着色器是本节的重点,我们也就完全基于之前的代码修改而来,核心目的是抽取出顶点着色器和片元着色器的逻辑,所以我们抽取出一个GL的代码,里面的内容固定不变,把顶点着色器和片元着色器的逻辑暴露出来即可。
在此之前先看看其他基础类的变化:
Vec2、Vec3,支持了使用数组构造,支持单个参数构造,支持下标访问:
import math


class Vec2:
    def __init__(self, x, y=None):
        if isinstance(x, (list, tuple)) and len(x) == 2 and y is None:
            self.x, self.y = x[0], x[1]
        else:
            self.x, self.y = x, y

    def __add__(self, other):
        return Vec2(self.x + other.x, self.y + other.y)

    def __sub__(self, other):
        return Vec2(self.x - other.x, self.y - other.y)

    def __mul__(self, other):
        if isinstance(other, (int, float)):  # 向量和标量的乘法
            return Vec2(self.x * other, self.y * other)
        elif isinstance(other, Vec2):  # 两个向量的点积
            return self.x * other.x + self.y * other.y

    def __rmul__(self, scalar):
        return self.__mul__(scalar)

    def norm(self):
        return math.sqrt(self.x * self.x + self.y * self.y)

    def normalize(self, l=1):
        norm = self.norm()
        self.x *= l / norm
        self.y *= l / norm
        return self

    def __getitem__(self, index):
        if index == 0:
            return self.x
        elif index == 1:
            return self.y
        else:
            raise IndexError("Index out of range")

    def __setitem__(self, index, value):
        if index == 0:
            self.x = value
        elif index == 1:
            self.y = value
        else:
            raise IndexError("Index out of range")

    def __str__(self):
        return f'({self.x}, {self.y})'


class Vec3:
    def __init__(self, x, y=None, z=None):
        if isinstance(x, (list, tuple)) and len(x) == 3 and y is None and z is None:
            self.x, self.y, self.z = x[0], x[1], x[2]
        else:
            self.x, self.y, self.z = x, y, z


    def __add__(self, other):
        return Vec3(self.x + other.x, self.y + other.y, self.z + other.z)

    def __sub__(self, other):
        return Vec3(self.x - other.x, self.y - other.y, self.z - other.z)

    def __mul__(self, other):
        if isinstance(other, (int, float)):  # 向量和标量的乘法
            return Vec3(self.x * other, self.y * other, self.z * other)
        elif isinstance(other, Vec3):  # 两个向量的点积
            return self.x * other.x + self.y * other.y + self.z * other.z

    def __rmul__(self, scalar):
        return self.__mul__(scalar)

    def cross(self, other):
        return Vec3(self.y * other.z - self.z * other.y,
                    self.z * other.x - self.x * other.z,
                    self.x * other.y - self.y * other.x)

    def norm(self):
        return math.sqrt(self.x * self.x + self.y * self.y + self.z * self.z)

    def normalize(self, l=1):
        norm = self.norm()
        self.x *= l / norm
        self.y *= l / norm
        self.z *= l / norm
        return self

    def __getitem__(self, index):
        if index == 0:
            return self.x
        elif index == 1:
            return self.y
        elif index == 2:
            return self.z
        else:
            raise IndexError("Index out of range")

    def __setitem__(self, index, value):
        if index == 0:
            self.x = value
        elif index == 1:
            self.y = value
        elif index == 2:
            self.z = value
        else:
            raise IndexError("Index out of range")

    def __str__(self):
        return f'({self.x}, {self.y}, {self.z})'
OBJ读取文件的更改,支持了顶点、纹理、法向量的读取:
from PIL import Image

from vector import Vec3, Vec2


class OBJFile:
    def __init__(self, filename):
        self.model_file = filename
        self.vertex: list[Vec3] = []  # 顶点坐标数组
        self.tex_coord: list[Vec2] = []  # 纹理坐标数组
        self.norms: list[Vec3] = []  # 法向量数组

        self.facet_vrt: list[int] = []  # 面片顶点索引
        self.facet_tex: list[int] = []  # 面片纹理索引
        self.facet_nrm: list[int] = []  # 面片法向量索引

        self.diffuse_map: Image = None  # 漫反射贴图
        self.normal_map: Image = None  # 法线贴图
        self.specular_map: Image = None  # 镜面反射贴图

        self.parse()

    def parse(self):
        with open(self.model_file, 'r') as file:
            for line in file:
                components = line.strip().split()
                if not components:
                    continue
                if components[0] == 'v':
                    self.vertex.append(Vec3(*map(float, components[1:4])))
                elif components[0] == 'vn':
                    self.norms.append(Vec3(*map(float, components[1:4])))
                elif components[0] == 'vt':
                    self.tex_coord.append(Vec2(float(components[1]), float(components[2])))
                    # self.tex_coord.append(float(coord) for coord in components[1:])
                elif components[0] == 'f':
                    for sp in components[1:]:
                        p = sp.split('/')
                        self.facet_vrt.append(int(p[0])-1)
                        self.facet_tex.append(int(p[1])-1)
                        self.facet_nrm.append(int(p[2])-1)
        # 打印顶点、面片、纹理坐标和法向量的数量
        print(f"# v# {self.n_vertex()} f# {self.n_face()} vt# {len(self.tex_coord)} vn# {len(self.norms)}")

        # 加载纹理
        self.load_texture("_diffuse.tga", self.diffuse_map)
        # self.load_texture("_nm_tangent.tga", self.normal_map)
        # self.load_texture("_spec.tga", self.specular_map)

    def n_vertex(self) -> int:
        # 返回顶点数量
        return len(self.vertex)

    def n_face(self) -> int:
        # 返回面片数量
        return int(len(self.facet_vrt) / 3)

    def vert(self, i: int, n: int = None) -> Vec3:
        # 返回顶点坐标
        if n is None:
            return self.vertex[i]
        else:
            return self.vertex[self.facet_vrt[i * 3 + n]]

    def load_texture(self, suffix: str, img: Image):
        # 加载纹理
        dot = self.model_file.rfind('.')
        if dot == -1:
            return
        tex_file = self.model_file[:dot] + suffix
        self.diffuse_map = Image.open(tex_file)
        print(f'Loading texture: {tex_file}--->{img}')
        # print(f"texture file {tex_file} loading {'ok' if img.load(tex_file) else 'failed'}")

    def normal(self, uvf: Vec2 = None, i: int = None, n: int = None) -> Vec3:
        """
        返回法向量
        """
        if uvf is not None:
            # 从法线贴图获取法线
            c = self.normal_map.getpixel((uvf.x * self.normal_map.width, uvf.y * self.normal_map.height))
            return Vec3(c[2], c[1], c[0]) * (2. / 255.) - Vec3(1, 1, 1)
        # 从法向量数组获取法线
        return self.norms[self.facet_nrm[i * 3 + n]]

    def uv(self, iface: int, n: int) -> Vec2:
        """
        返回纹理坐标
        """
        return self.tex_coord[self.facet_tex[iface * 3 + n]]
对于颜色,也抽取一个Color类:
class Color:
    def __init__(self, r, g=None, b=None):
        if isinstance(r, (list, tuple)) and len(r) == 3 and g is None and b is None:
            self.r, self.g, self.b = r[0], r[1], r[2]
        else:
            self.r, self.g, self.b = r, g, b

    def __getitem__(self, index):
        if index == 0:
            return self.r
        elif index == 1:
            return self.g
        elif index == 2:
            return self.b
        else:
            raise IndexError("Index out of range")

    def __setitem__(self, index, value):
        if index == 0:
            self.r = value
        elif index == 1:
            self.g = value
        elif index == 2:
            self.b = value
        else:
            raise IndexError("Index out of range")

    def get_color(self):
        return (self.r, self.g, self.b)
现在就来到了最重要的部分,拆解出 gl.py, triangle这部分是固定代码也放在 gl.py 中:
import numpy as np

from camera import Camera
from image import MyImage
from matrix import Matrix
from shader import IShader
from vector import Vec3, Vec2


def local_2_homo(v: Vec3):
    """
    局部坐标变换成齐次坐标
    """
    m = Matrix(4, 1)
    m[0][0] = v.x
    m[1][0] = v.y
    m[2][0] = v.z
    m[3][0] = 1.0
    return m


# 模型变换矩阵
def model_matrix():
    return Matrix.identity(4)


def view_matrix(camera: Camera):
    r_inverse = np.identity(4)
    t_inverse = np.identity(4)
    for i in range(3):
        r_inverse[0][i] = camera.right[i]
        r_inverse[1][i] = camera.up[i]
        r_inverse[2][i] = -camera.front[i]

        t_inverse[i][3] = -camera.position[i]
    view = np.dot(r_inverse, t_inverse)
    return Matrix.from_np(view)


# 透视投影变换矩阵(调整FOV)
def projection_matrix(eye):
    projection = Matrix.identity(4)
    projection[3][2] = -1.0 / eye.z * 0.01
    return projection


# 此时我们的所有的顶点已经经过了透视投影变换,接下来需要进行透视除法
def projection_division(m: Matrix):
    m[0][0] = m[0][0] / m[3][0]
    m[1][0] = m[1][0] / m[3][0]
    m[2][0] = m[2][0] / m[3][0]
    m[3][0] = 1.0
    return m


def viewport_matrix(x, y, w, h, depth):
    """
    视口变换将NDC坐标转换为屏幕坐标
    """
    m = Matrix.identity(4)
    m[0][3] = x + w / 2.
    m[1][3] = y + h / 2.
    m[2][3] = depth / 2.

    m[0][0] = w / 2.
    m[1][1] = h / 2.
    m[2][2] = depth / 2.
    return m


def homo_2_vertices(m: Matrix):
    """
    去掉第四个分量,将其恢复到三维坐标
    """
    return Vec3([int(m[0][0]), int(m[1][0]), int(m[2][0])])


def get_mvp(camera, eye, width, height, depth):
    model_ = model_matrix()
    view_ = view_matrix(camera)
    projection_ = projection_matrix(eye)
    viewport_ = viewport_matrix(width / 8, height / 8, width * 3 / 4, height * 3 / 4, depth)
    return model_, view_, projection_, viewport_


def triangle_area_2d(a: Vec2, b: Vec2, c: Vec2) -> float:
    """
    计算三角形面积
    """
    return .5 * ((b.y - a.y) * (b.x + a.x) + (c.y - b.y) * (c.x + b.x) + (a.y - c.y) * (a.x + c.x))


def barycentric(A, B, C, P):
    """
    计算重心坐标 u, v, w
    """
    total_area = triangle_area_2d(A, B, C)
    if total_area == 0:
        return None  # 或者抛出一个异常,或者返回一个特殊的值
    u = triangle_area_2d(P, B, C) / total_area
    v = triangle_area_2d(P, C, A) / total_area
    w = triangle_area_2d(P, A, B) / total_area
    return Vec3(u, v, w)


def triangle(screen_coords: list[Vec3], shader: IShader, img: MyImage, z_buffer):
    p0, p1, p2 = screen_coords
    min_x = max(0, min(p0.x, p1.x, p2.x))
    max_x = min(img.width - 1, max(p0.x, p1.x, p2.x))
    min_y = max(0, min(p0.y, p1.y, p2.y))
    max_y = min(img.height - 1, max(p0.y, p1.y, p2.y))
    P = Vec2((0, 0))

    # 遍历包围盒内的每个像素
    for P.y in range(min_y, max_y + 1):
        for P.x in range(min_x, max_x + 1):
            # 计算当前像素的重心坐标
            bc_screen = barycentric(p0, p1, p2, P)
            if bc_screen is None:
                continue
            # 如果像素的重心坐标的任何一个分量小于0,那么这个像素就在三角形的外部,我们就跳过它
            if bc_screen.x < 0 or bc_screen.y < 0 or bc_screen.z < 0:
                continue
            skip, color = shader.fragment(bc_screen)
            if skip:
                continue
            # 计算当前像素的深度
            z = p0.z * bc_screen.x + p1.z * bc_screen.y + p2.z * bc_screen.z
            # 检查Z缓冲区,如果当前像素的深度比Z缓冲区中的值更近,那么就更新Z缓冲区的值,并绘制像素
            idx = P.x + P.y * img.width
            if z_buffer[idx] < z:
                z_buffer[idx] = z
                img.putpixel((P.x, P.y), color)
IShader.py抽取Shader的结构:
from abc import ABC, abstractmethod

from PIL import Image

from color import Color
from vector import Vec2, Vec3


class IShader(ABC):
    @staticmethod
    def sample_2d(img: Image, uvf: Vec2):
        pixel = img.getpixel((uvf.x * img.width, uvf.y * img.height))
        return pixel

    @abstractmethod
    def vertex(self, iface: int, n: int):
        pass

    @abstractmethod
    def fragment(self, bar: Vec3) -> (bool, Color):
        pass
main.py 中实现这个Shader:
import sys

from camera import Camera
from color import Color
from gl import triangle, get_mvp, projection_division, homo_2_vertices, local_2_homo
from image import MyImage
from obj import OBJFile
from shader import IShader
from vector import Vec3, Vec2

width = 900
height = 900
depth = 255

# 光照方向
light_dir = Vec3(0, 0, 1)

# 摄像机摆放的位置
eye = Vec3(1, 1, 2)
center = Vec3(0, 0, 0)
up = Vec3(0, 1, 0)

camera = Camera(eye, up, center - eye)


model_, view_, projection_, viewport_ = get_mvp(camera, eye, width, height, depth)


class MyShader(IShader):
    def __init__(self):
        self.varying_intensity: Vec3 = Vec3(0, 0, 0)
        self.uv_coords: list[Vec2] = [Vec2.zero()] * 3

    def vertex(self, iface: int, n: int) -> Vec3:
        """
        顶点着色器
        :param iface: 面索引
        :param n: 顶点索引
        :return:
        """
        self.varying_intensity[n] = max(0, obj.normal(None, iface, n) * light_dir)
        self.uv_coords[j] = obj.uv(i, n)
        v: Vec3 = obj.vert(i, n)
        return homo_2_vertices(viewport_ * projection_division(projection_ * view_ * model_ * local_2_homo(v)))

    def fragment(self, bar: Vec3):
        """
        片元着色器
        :param bar: 重心坐标
        :return:
        """
        intensity = self.varying_intensity * bar
        if intensity < 0:
            return True, None

        uv0, uv1, uv2 = self.uv_coords
        uv = uv0 * bar.x + uv1 * bar.y + uv2 * bar.z
        tga = obj.diffuse_map
        color = tga.getpixel((int(uv.x * tga.width), tga.height - 1 - int(uv.y * tga.height)))
        color = Color(int(color[0] * intensity), int(color[1] * intensity), int(color[2] * intensity))
        return False, color


if __name__ == '__main__':
    shader: MyShader = MyShader()
    image = MyImage((width, height))
    z_image = MyImage((width, height))

    # -sys.maxsize - 1 最小值
    z_buffer = [-sys.maxsize - 1] * width * height

    obj = OBJFile('african_head.obj')

    for i in range(obj.n_face()):
        screen_coords = [None, None, None]  # 第i个面片三个顶点的屏幕坐标
        world_coords = [None, None, None]  # 第i个面片三个顶点的世界坐标
        uv_coords = [None, None, None]
        for j in range(3):
            screen_coords[j] = shader.vertex(i, j)
        triangle(screen_coords, shader, image, z_buffer)
    image.save('out.bmp')

    z_image = MyImage((width, height))
    # 在所有三角形都被渲染后,遍历Z-buffer以找到最大和最小的深度值
    z_min = min(z for z in z_buffer if z != -sys.maxsize - 1)
    z_max = max(z for z in z_buffer if z != -sys.maxsize - 1)

    # 然后,遍历Z-buffer,对每个深度值进行归一化,然后将其映射到0到255的范围
    for i in range(len(z_buffer)):
        if z_buffer[i] != -sys.maxsize - 1:
            # 首先将Z值偏移,使其变为正数
            z_positive = z_buffer[i] - z_min
            # 然后归一化深度值
            z_normalized = z_positive / (z_max - z_min)
            # 映射到0到255的范围
            depth_color = int(z_normalized * 255)
            # 在深度图中设置像素颜色
            x = i % width
            y = i // width
            z_image.putpixel((x, y), (depth_color, depth_color, depth_color))

    z_image.save('z_out.bmp')
好了,现在我们就只需要关心 shader中vertex与fragment的实现即可。
现在只需要稍微改下fragment就可以实现TinyRenderer的效果:
def fragment(self, bar: Vec3):
    intensity = self.varying_intensity * bar
    if intensity < 0:
        return True, None

    if intensity > .85:
        intensity = 1
    elif intensity > .60:
        intensity = .80
    elif intensity > .45:
        intensity = .60
    elif intensity > .30:
        intensity = .45
    elif intensity > .15:
        intensity = .30
    else:
        intensity = 0
    color = Color(int(255 * intensity), int(155 * intensity), 0)
    return False, color

应用法线贴图
在此需要更改obj文件的一个方法,如果 UV 坐标系的 y 方向和图像的 y 方向是相反的,那么就需要反转 y 坐标:
def normal(self, uvf: Vec2 = None, i: int = None, n: int = None) -> Vec3:
    """
    返回法向量
    """
    if uvf is not None:
        # 从法线贴图获取法线
        c = self.normal_map.getpixel((uvf.x * self.normal_map.width, self.normal_map.height - 1 - uvf.y * self.normal_map.height))
        return Vec3(c[2], c[1], c[0]) * (2. / 255.) - Vec3(1, 1, 1)
    # 从法向量数组获取法线
    return self.norms[self.facet_nrm[i * 3 + n]]
vector也新增了to_matrix的方法:
def to_matrix(self):
    m = Matrix(3, 1).m
    m[0, 0] = self.x
    m[1, 0] = self.y
    m[2, 0] = self.z
    return m

def to_matrix(self):
    m = Matrix(2, 1).m
    m[0, 0] = self.x
    m[1, 0] = self.y
    return m
接下来应用法线贴图:
import sys
from camera import Camera
from color import Color
from gl import triangle, get_mvp, projection_division, homo_2_vertices, local_2_homo
from image import MyImage
from matrix import Matrix
from obj import OBJFile
from shader import IShader
from vector import Vec3, Vec2
width = 900
height = 900
depth = 255
# 光照方向
light_dir = Vec3(0, 0, 1)
# 摄像机摆放的位置
eye = Vec3(1, 1, 2)
center = Vec3(0, 0, 0)
up = Vec3(0, 1, 0)
camera = Camera(eye, up, center - eye)
model_, view_, projection_, viewport_ = get_mvp(camera, eye, width, height, depth)
class MyShader(IShader):
def __init__(self):
self.varying_uv: Matrix = Matrix(2, 3)
self.uniform_M: Matrix = Matrix.identity(4)
self.uniform_MIT: Matrix = Matrix.identity(4)
def vertex(self, iface: int, n: int) -> Vec3:
"""
顶点着色器
:param iface: 面索引
:param n: 顶点索引
:return:
"""
self.varying_uv.set_col(n, obj.uv(iface, n))
v: Vec3 = obj.vert(iface, n)
return homo_2_vertices(viewport_ * projection_division(projection_ * view_ * model_ * local_2_homo(v)))
def fragment(self, bar: Vec3):
"""
片元着色器
:param bar: 重心坐标
:return:
"""
uv: Vec2 = Vec2((self.varying_uv.m @ bar.to_matrix())[0][0], (self.varying_uv.m @ bar.to_matrix())[1][0])
n = (self.uniform_MIT * local_2_homo(obj.normal(uv))).m
n: Vec3 = Vec3(n[0][0], n[1][0], n[2][0]).normalize()
l = (self.uniform_M * local_2_homo(light_dir)).m
l: Vec3 = Vec3(l[0][0], l[1][0], l[2][0]).normalize()
intensity: float = max(0.0, n * l)
if intensity < 0:
return True, None
tga = obj.diffuse_map
color = tga.getpixel((int(uv.x * tga.width), tga.height - 1 - int(uv.y * tga.height)))
# color = [255, 255, 255]
color = Color(int(color[0] * intensity), int(color[1] * intensity), int(color[2] * intensity))
return False, color
if __name__ == '__main__':
shader: MyShader = MyShader()
shader.uniform_M = projection_ * model_ * view_
shader.uniform_MIT = (projection_ * model_ * view_).transpose()
image = MyImage((width, height))
z_image = MyImage((width, height))
# -sys.maxsize - 1 最小值
z_buffer = [-sys.maxsize - 1] * width * height
obj = OBJFile('african_head.obj')
for i in range(obj.n_face()):
screen_coords = [None, None, None] # 第i个面片三个顶点的屏幕坐标
world_coords = [None, None, None] # 第i个面片三个顶点的世界坐标
uv_coords = [None, None, None]
for j in range(3):
screen_coords[j] = shader.vertex(i, j)
triangle(screen_coords, shader, image, z_buffer)
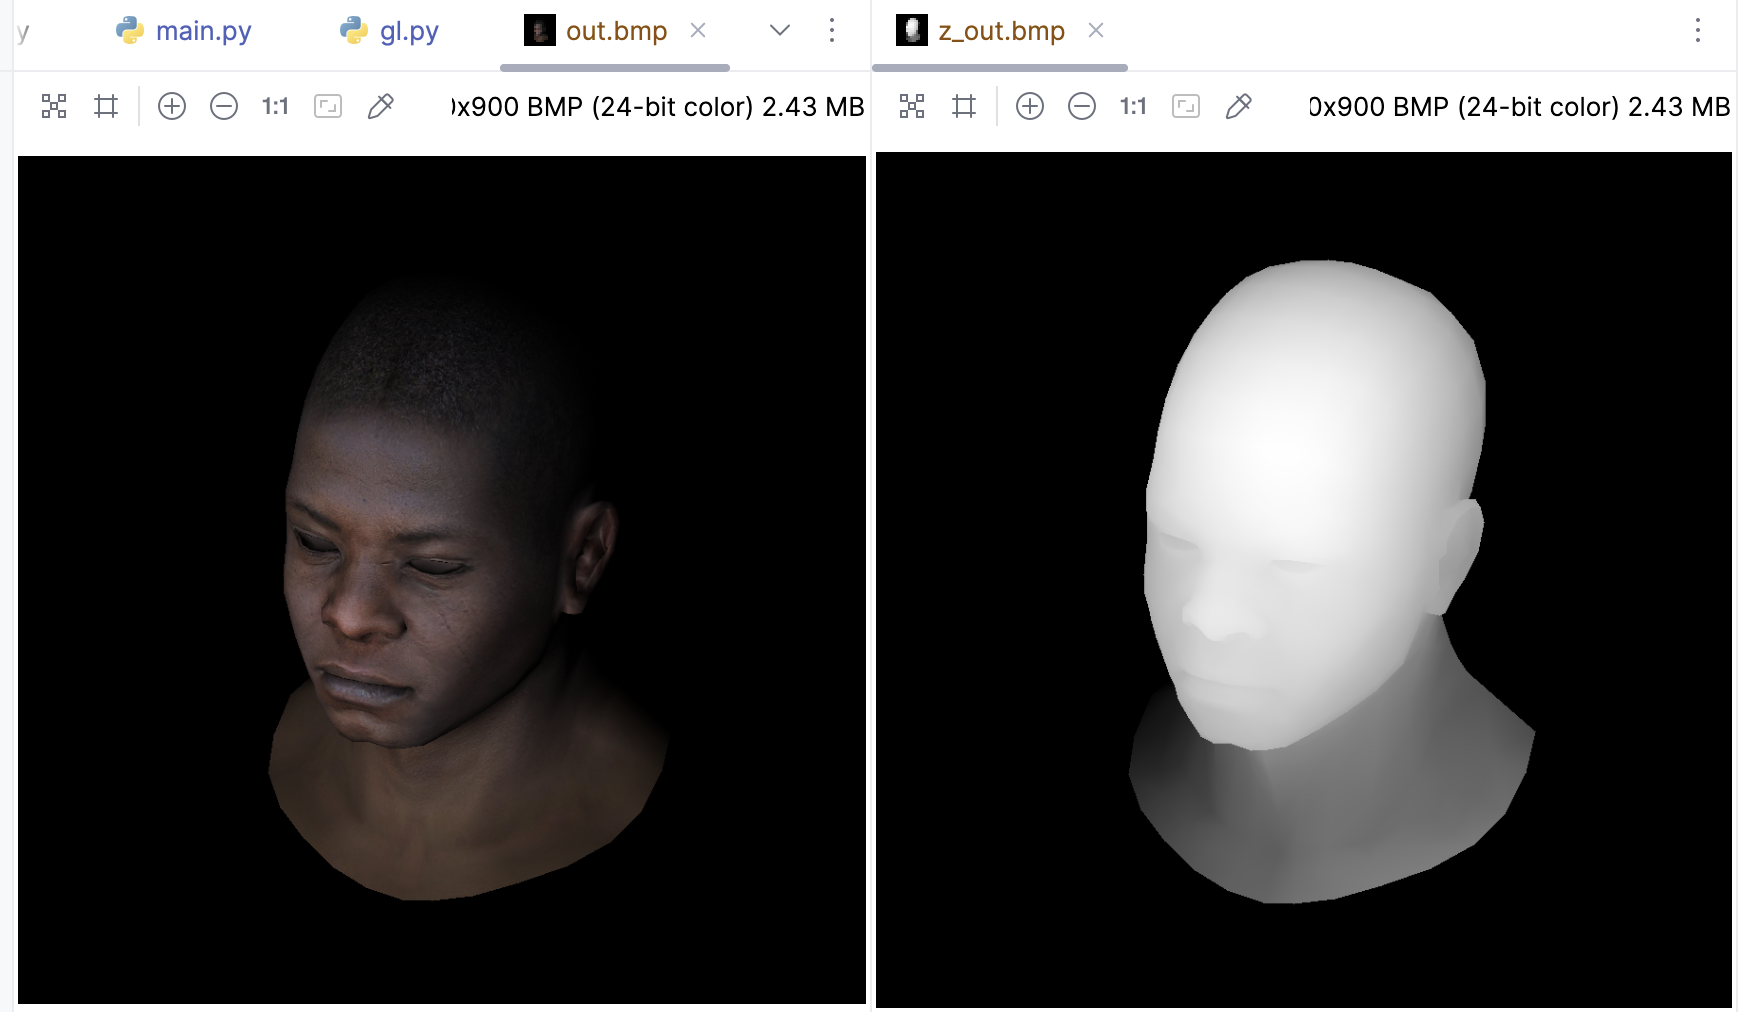
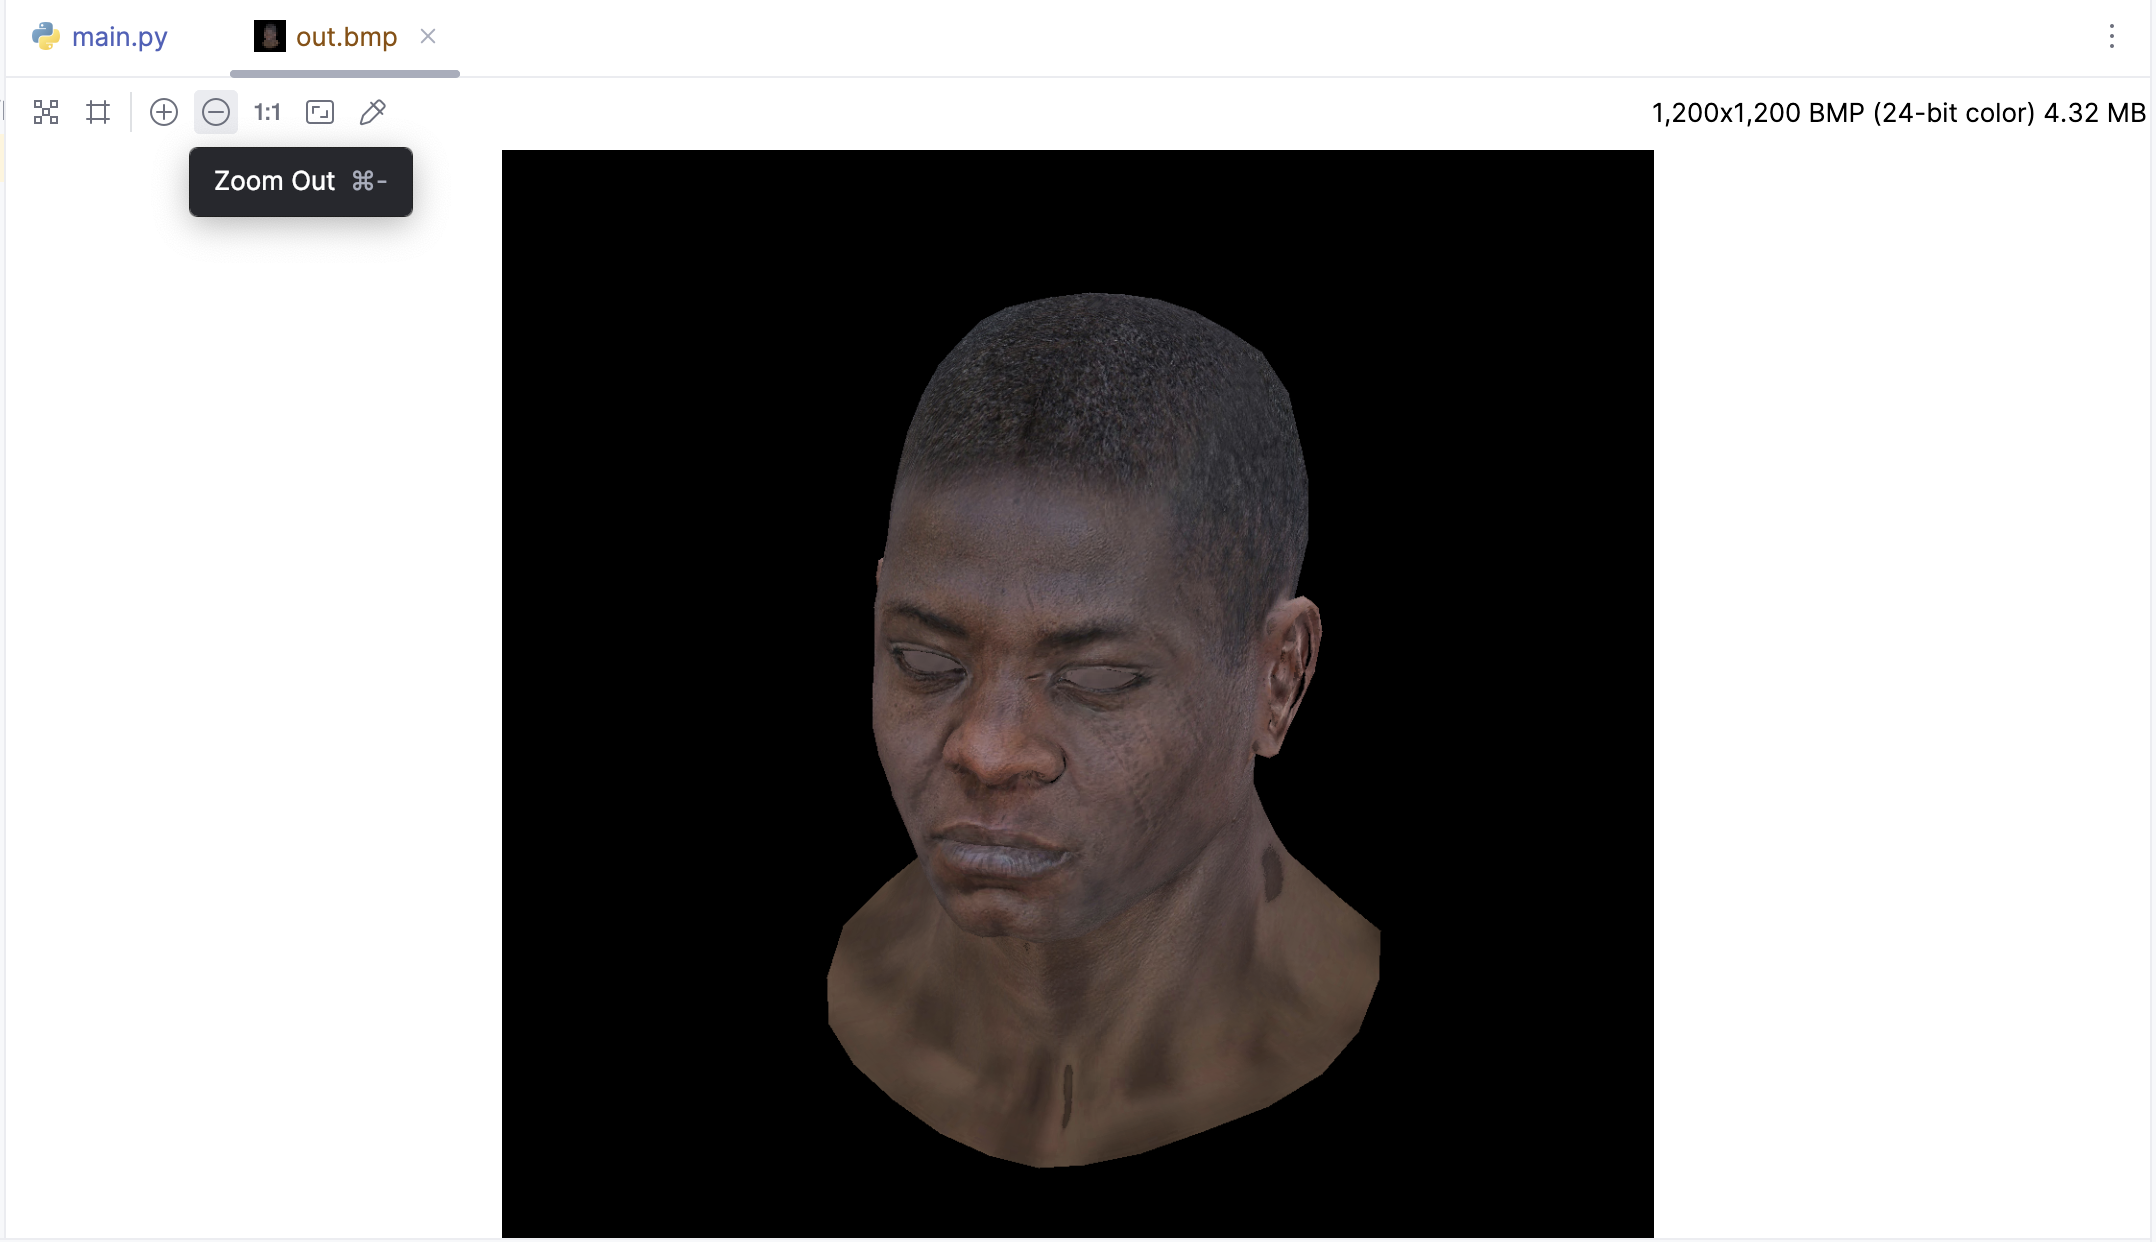
image.save('out.bmp')
法线贴图通常看起来是蓝色的,这是因为它们是用来存储表面法线方向信息。在法线贴图中,RGB 颜色的每一个通道(红、绿、蓝)都对应了三维空间中的一个轴(X、Y、Z)。这种方式可以将一个三维向量编码为一个颜色。
在一个标准的法线贴图中:
- 红色通道对应 X 方向,从左(0)到右(255);
- 绿色通道对应 Y 方向,从下(0)到上(255);
- 蓝色通道对应 Z 方向,从里(0)到外(255)。
当一个表面的法线直接指向观察者时,对应的法线颜色是 (128, 128, 255)。这是因为 X 和 Y 方向(红色和绿色通道)没有偏移(128 是中间值,表示没有偏移),而 Z 方向(蓝色通道)是最大值 255,表示法线指向观察者。这就是为什么法线贴图通常看起来是蓝色的原因。
应用镜面反射贴图
def specular(self, uvf: Vec2 = None):
    c = self.specular_map.getpixel((uvf.x * self.specular_map.width, self.specular_map.height - 1 - uvf.y * self.specular_map.height))
    return c / 128
对于镜面反射可以先计算反射光线向量r,然后计算镜面反射specular。最后,它将颜色的每个分量乘以 (intensity + 0.6 * specular),并确保结果不超过255。这将模拟镜面反射对颜色的影响。
def fragment(self, bar: Vec3):
    """
    片元着色器
    :param bar: 重心坐标
    :return:
    """
    uv: Vec2 = Vec2((self.varying_uv.m @ bar.to_matrix())[0][0], (self.varying_uv.m @ bar.to_matrix())[1][0])

    n = (self.uniform_MIT * local_2_homo(obj.normal(uv))).m
    n: Vec3 = Vec3(n[0][0], n[1][0], n[2][0]).normalize()
    l = (self.uniform_M * local_2_homo(light_dir)).m
    l: Vec3 = Vec3(l[0][0], l[1][0], l[2][0]).normalize()

    r = (n*(n*l*2.) - l).normalize()
    specular = pow(max(r.z, 0.0), obj.specular(uv))

    intensity: float = max(0.0, n * l)
    if intensity < 0:
        return True, None
    tga = obj.diffuse_map
    color = tga.getpixel((int(uv.x * tga.width), tga.height - 1 - int(uv.y * tga.height)))
    a = int(color[0] * (intensity + 0.8 * specular))
    b = int(color[1] * (intensity + 0.8 * specular))
    c = int(color[2] * (intensity + 0.8 * specular))
    color = (min(a, 255), min(b, 255), min(c, 255))
    return False, color
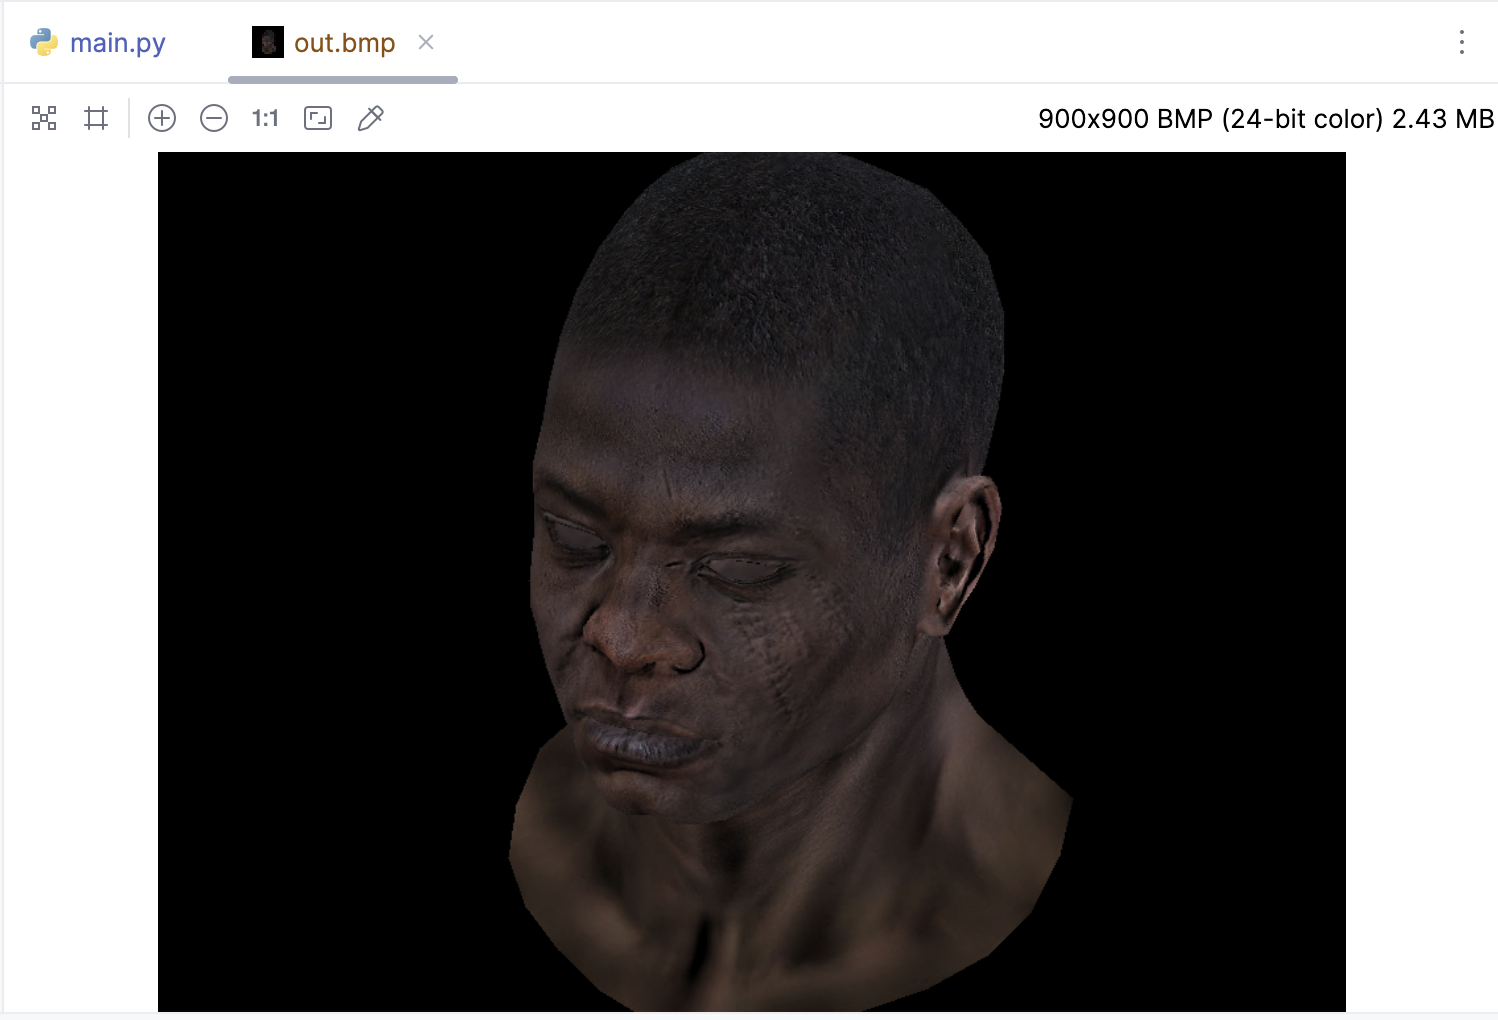
其实重点看一下fragment中的实现即可,下面是使用了镜面反射的贴图的效果:
关于TinyRenderer的lesson06中提到的光照模型,其实在之前的笔记中有写过, 《Blinn-Phong光照模型与着色方法》 ,理论相关的内容可以参考,其中介绍了 Blinn-Phong 光照模型,用于计算每个像素点的颜色。首先解释了为何能看到物体,并将光线分为镜面反射、漫反射和环境光三类。接着详述泛光模型(只考虑环境光)、Lambert 漫反射模型(增加漫反射项)以及 Phong 反射模型(在 Lambert 基础上加入镜面反射)。最后引入 Blinn-Phong 改进版,通过半程向量优化角度计算效率。还比较了 Flat Shading 等不同着色方法对渲染效果的影响。笔记中这些都是Bilibili的闫令琪老师的《计算机图形学入门》中的内容,先搞清楚理论就容易理解代码了。
本节就先这样,代码我放在这里了: https://github.com/zouchanglin/PyTinyRenderer