自定义SpringBootStarter
在日常使用SpringBoot的开发中,如果想要引入某个组件,几乎都是直接引入一个SpringBootStarter就完事,分析了SpringBoot的具体启动流程以及自动配置的原理其实很容易明白官方的starter是如何运行起来的,并且我们可以制作一个自己的SpringBootStarter,并且我会把自制的SpringBootStarter推送到公服,本篇文章会记录一个完整的开发流程。
创建SpringBootStarter
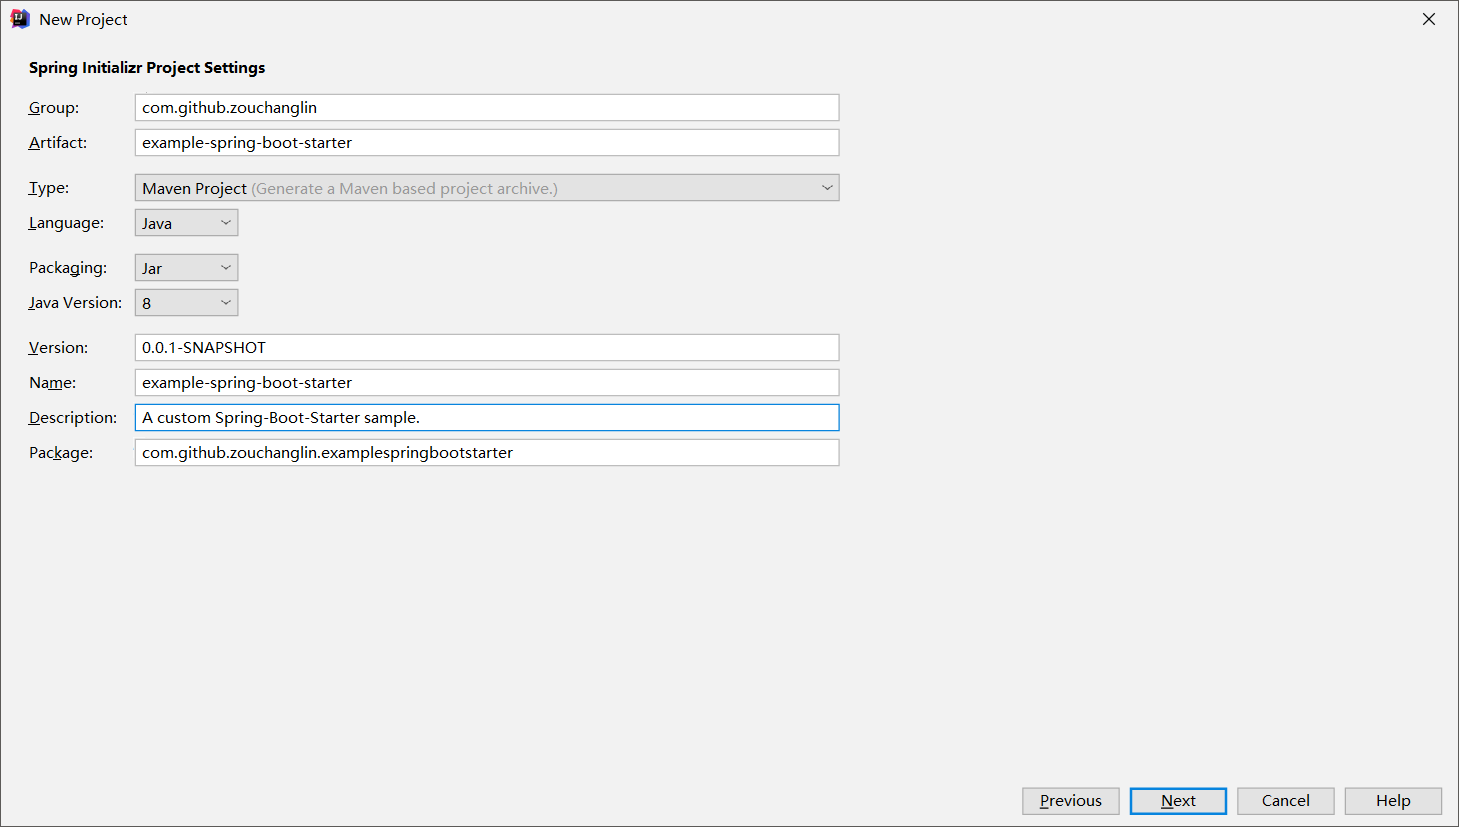
其实就是创建一个普通的SpringBoot项目,无论是用Gradle还是Maven都可以,我这里选择的是Maven的方式,只不过项目的命名方式略微有所不同,因为Spring官方的starter命令为spring-boot-starter-xxx,所以我们开发的项目不要以spring-boot开头。 建议写成:xxx-spring-boot-starter,代表我们这是一个非官方的SpringBootStarter。
pom.xml
 1<?xml version="1.0" encoding="UTF-8"?>
 2<project xmlns="http://maven.apache.org/POM/4.0.0" xmlns:xsi="http://www.w3.org/2001/XMLSchema-instance"
 3         xsi:schemaLocation="http://maven.apache.org/POM/4.0.0 https://maven.apache.org/xsd/maven-4.0.0.xsd">
 4    <modelVersion>4.0.0</modelVersion>
 5    <parent>
 6        <groupId>org.springframework.boot</groupId>
 7        <artifactId>spring-boot-starter-parent</artifactId>
 8        <version>2.2.6.RELEASE</version>
 9        <relativePath/> <!-- lookup parent from repository -->
10    </parent>
11
12    <groupId>com.github.zouchanglin</groupId>
13    <artifactId>example-spring-boot-starter</artifactId>
14    <version>0.0.1-SNAPSHOT</version>
15    <name>example-spring-boot-starter</name>
16    <description>A custom Spring-Boot-Starter sample.</description>
17
18    <properties>
19        <java.version>1.8</java.version>
20        <spring.boot>2.2.6.RELEASE</spring.boot>
21    </properties>
22
23    <dependencyManagement>
24        <dependencies>
25            <dependency>
26                <groupId>org.springframework.boot</groupId>
27                <artifactId>spring-boot-dependencies</artifactId>
28                <version>${spring.boot}</version>
29                <type>pom</type>
30                <scope>import</scope>
31            </dependency>
32        </dependencies>
33    </dependencyManagement>
34
35    <dependencies>
36        <dependency>
37            <groupId>org.springframework.boot</groupId>
38            <artifactId>spring-boot-autoconfigure</artifactId>
39        </dependency>
40        <dependency>
41            <groupId>org.springframework.boot</groupId>
42            <artifactId>spring-boot-configuration-processor</artifactId>
43            <optional>true</optional>
44        </dependency>
45    </dependencies>
46</project>
我们编写一个工具类AESHandleUtil.java,假设我们需要封装一个AES加密的工具类,在这个工具类里面呢,我们想把初始化秘钥随机串的长度作为用户的自定义参数,用户可以根据自己的实际需要定义是长度为128?256还是一些其他的值。
 1package com.github.zouchanglin.examplespringbootstarter.util;
 2
 3import javax.crypto.Cipher;
 4import javax.crypto.KeyGenerator;
 5import javax.crypto.SecretKey;
 6import javax.crypto.spec.SecretKeySpec;
 7import java.nio.charset.StandardCharsets;
 8import java.security.SecureRandom;
 9
10public class AESHandleUtil {
11    /**
12     * AES加密字符串
13     *
14     * @param content 需要被加密的字符串
15     * @param password 加密需要的密码
16     * @param length 初始化秘钥随机串的长度
17     * @return 密文
18     */
19    public static byte[] encrypt(String content, String password, Integer length) {
20        try {
21            // 创建AES的Key生产者
22            KeyGenerator keyGenerator = KeyGenerator.getInstance("AES");
23            // 利用用户密码作为随机数初始化出
24            keyGenerator.init(length, new SecureRandom(password.getBytes()));
25            // 加密没关系,SecureRandom是生成安全随机数序列
26            // 根据用户密码,生成一个密钥
27            SecretKey secretKey = keyGenerator.generateKey();
28            // 返回基本编码格式的密钥,如果此密钥不支持编码,则返回
29            byte[] enCodeFormat = secretKey.getEncoded();
30            // 转换为AES专用密钥
31            SecretKeySpec key = new SecretKeySpec(enCodeFormat, "AES");
32            // 创建密码器
33            Cipher cipher = Cipher.getInstance("AES");
34            byte[] byteContent = content.getBytes(StandardCharsets.UTF_8);
35            // 初始化为加密模式的密码器
36            cipher.init(Cipher.ENCRYPT_MODE, key);
37            // 加密
38            return cipher.doFinal(byteContent);
39        } catch (Exception e) {
40            e.printStackTrace();
41        }
42        return null;
43    }
44
45    /**
46     * 解密AES加密过的字符串
47     *
48     * @param content AES加密过过的内容
49     * @param password 加密时的密码
50     * @param length 初始化秘钥随机串的长度
51     * @return 明文
52     */
53    public static byte[] decrypt(byte[] content, String password, Integer length) {
54        try {
55            // 创建AES的Key生产者
56            KeyGenerator keyGenerator = KeyGenerator.getInstance("AES");
57            keyGenerator.init(length, new SecureRandom(password.getBytes()));
58            // 根据用户密码,生成一个密钥
59            SecretKey secretKey = keyGenerator.generateKey();
60            // 返回基本编码格式的密钥
61            byte[] enCodeFormat = secretKey.getEncoded();
62            // 转换为AES专用密钥
63            SecretKeySpec key = new SecretKeySpec(enCodeFormat, "AES");
64            // 创建密码器
65            Cipher cipher = Cipher.getInstance("AES");
66            // 初始化为解密模式的密码器
67            cipher.init(Cipher.DECRYPT_MODE, key);
68            // 明文
69            return cipher.doFinal(content);
70        } catch (Exception e) {
71            e.printStackTrace();
72        }
73        return null;
74    }
75}
接下来我们写一个AESHandleService.java,其实就是对工具类做了一个封装:
 1package com.github.zouchanglin.examplespringbootstarter.service;
 2
 3import com.github.zouchanglin.examplespringbootstarter.util.AESHandleUtil;
 4
 5public class AESHandleService {
 6    private final Integer length;
 7
 8    public AESHandleService(Integer length) {
 9        this.length = length;
10    }
11
12    public byte[] encrypt(String content, String password) {
13        return AESHandleUtil.encrypt(content, password, length);
14    }
15
16    public byte[] decrypt(byte[] content, String password) {
17        return AESHandleUtil.decrypt(content, password, length);
18    }
19}
由于我们需要用户去自定义一些参数,那么我们先用一个类把自定义参数给装起来,AESHandleServiceProperties.java:如果对这些注解有疑问的话可以参考我的一篇文章《 SpringBoot自定义配置文件 》,里面对SpringBoot自定义配置的操作解释的比较详细。
 1package com.github.zouchanglin.examplespringbootstarter.config;
 2
 3import org.springframework.boot.context.properties.ConfigurationProperties;
 4
 5@ConfigurationProperties(prefix = "aes")
 6public class AESHandleServiceProperties {
 7    private Integer length = 128;
 8
 9    public Integer getLength() {
10        return length;
11    }
12
13    public void setLength(Integer length) {
14        this.length = length;
15    }
16}
接下来就是最重要的一步:编写自动装配类AESHandleAutoConfiguration.java:
 1package com.github.zouchanglin.examplespringbootstarter.config;
 2
 3import com.github.zouchanglin.examplespringbootstarter.service.AESHandleService;
 4import org.springframework.beans.factory.annotation.Autowired;
 5import org.springframework.boot.context.properties.EnableConfigurationProperties;
 6import org.springframework.context.annotation.Bean;
 7import org.springframework.context.annotation.Configuration;
 8
 9
10@Configuration
11@EnableConfigurationProperties(AESHandleServiceProperties.class)
12public class AESHandleAutoConfiguration {
13    @Autowired
14    private AESHandleServiceProperties properties;
15
16    @Bean
17    AESHandleService aesHandleService() {
18        return new AESHandleService(properties.getLength());
19    }
20}
当然关于Bean的实例化条件控制等,也可以加上@ConditionalOnBean与@ConditionalOnClass这些注解,在这里就不详细介绍这些注解了。官方的参数文档在这里:
《49.3.2 Bean Conditions》
。接下来需要编写spring.factories,这一步也很重要,Spring Boot自动注入的原理来源于 Spring Boot应用在启动过程中会通过SpringFactoriesLoader 加载所有 META-INF/spring.factories 文件,通过一系列的处理流程最终将spring.factories 文件中的定义的各种 beans 装载入ApplicationContext容器。所以编写spring.factories一定别忘记:
1org.springframework.boot.autoconfigure.EnableAutoConfiguration=\
2  com.github.zouchanglin.examplespringbootstarter.config.AESHandleAutoConfiguration
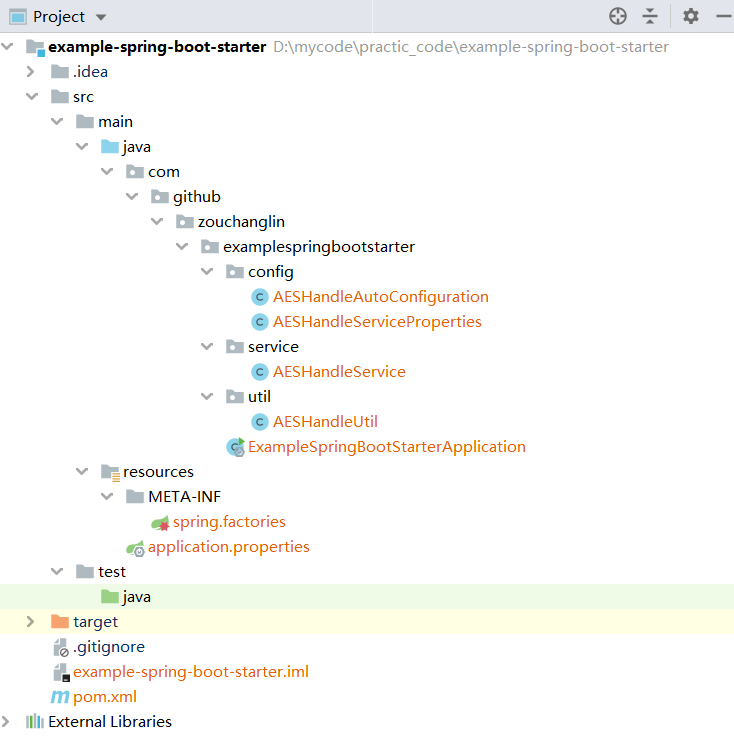
最后,由于我们把测试的依赖删除了,所以测试代码也可以选择不要,那么整个工程目录如下图所示:
最后一步,只需要mvn install,就可以把这个starter发布到本地仓库。
测试SpringBootStarter
新建SpringBoot项目并且引入这个Starter:
1<dependency>
2    <groupId>com.github.zouchanglin</groupId>
3    <artifactId>example-spring-boot-starter</artifactId>
4    <version>0.0.1-SNAPSHOT</version>
5</dependency>
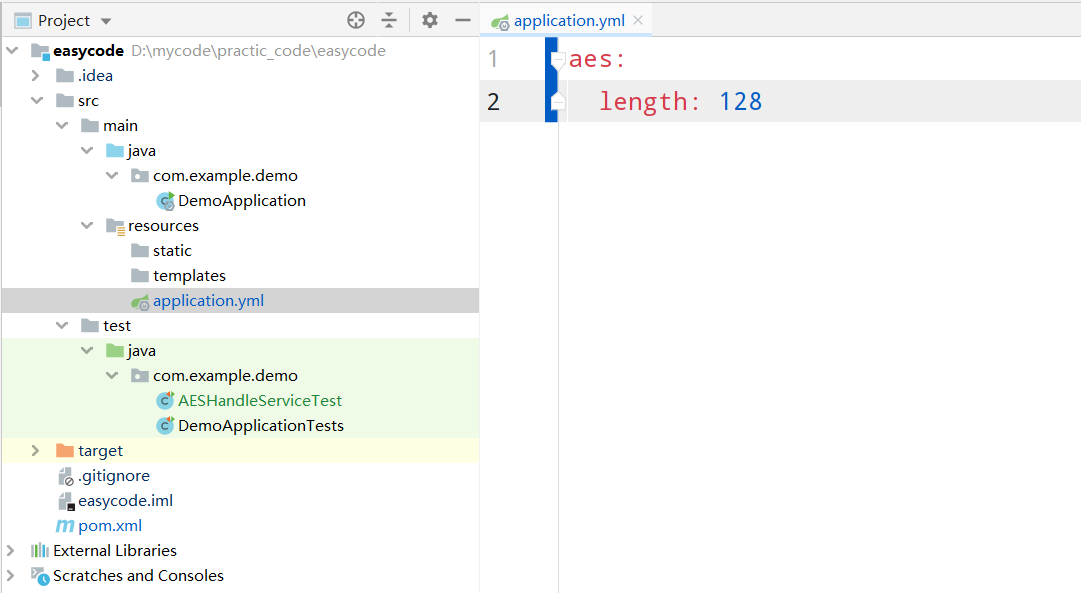
并且我们可以在配置文件里面指定这个starter可以配置的参数,即随机串的长度(其实不配置也有默认值)
接下来通过测试代码去测试一下:
1package com.example.demo;
2
3import com.github.zouchanglin.examplespringbootstarter.service.AESHandleService;
4import org.junit.Test;
5import org.junit.runner.RunWith;
6import org.springframework.beans.factory.annotation.Autowired;
7import org.springframework.boot.test.context.SpringBootTest;
8import org.springframework.test.context.junit4.SpringRunner;
9
10import static org.junit.Assert.*;
11
12@SpringBootTest
13@RunWith(SpringRunner.class)
14public class AESHandleServiceTest {
15 @Autowired
16 private AESHandleService aesHandleService;
17
18 @Test
19 public void encryptAndDecrypt() {
20 String src = "Hello, SpringBootStarter";
21 String password = "123321";
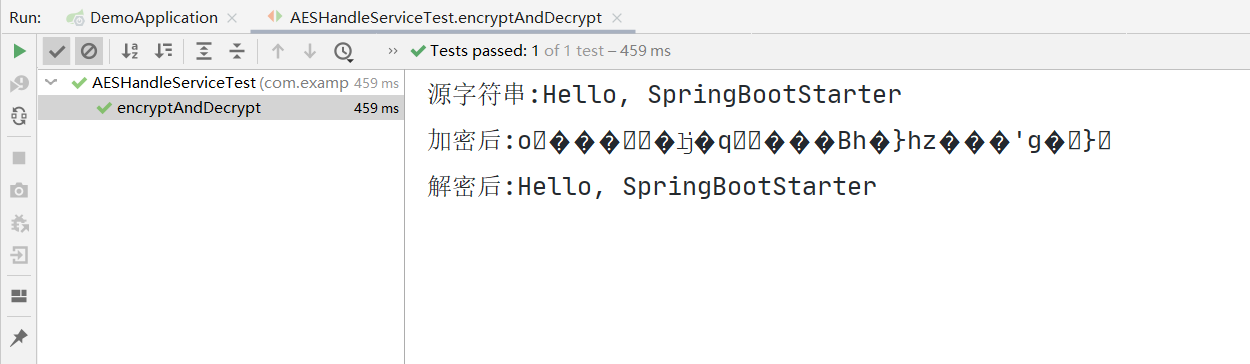
22 System.out.println("源字符串:" + src);
23
24 byte[] encryptResult = aesHandleService.encrypt(src, password);
25 String encryptString = new String(encryptResult);
26 System.out.println("加密后:" + encryptString);
27
28 byte[] decryptResult = aesHandleService.decrypt(encryptResult, password);
29 String decryptString = new String(decryptResult);
30 System.out.println("解密后:" + decryptString);
31
32 assertEquals(src, decryptString);
33 }
34}
推送至 jitpack
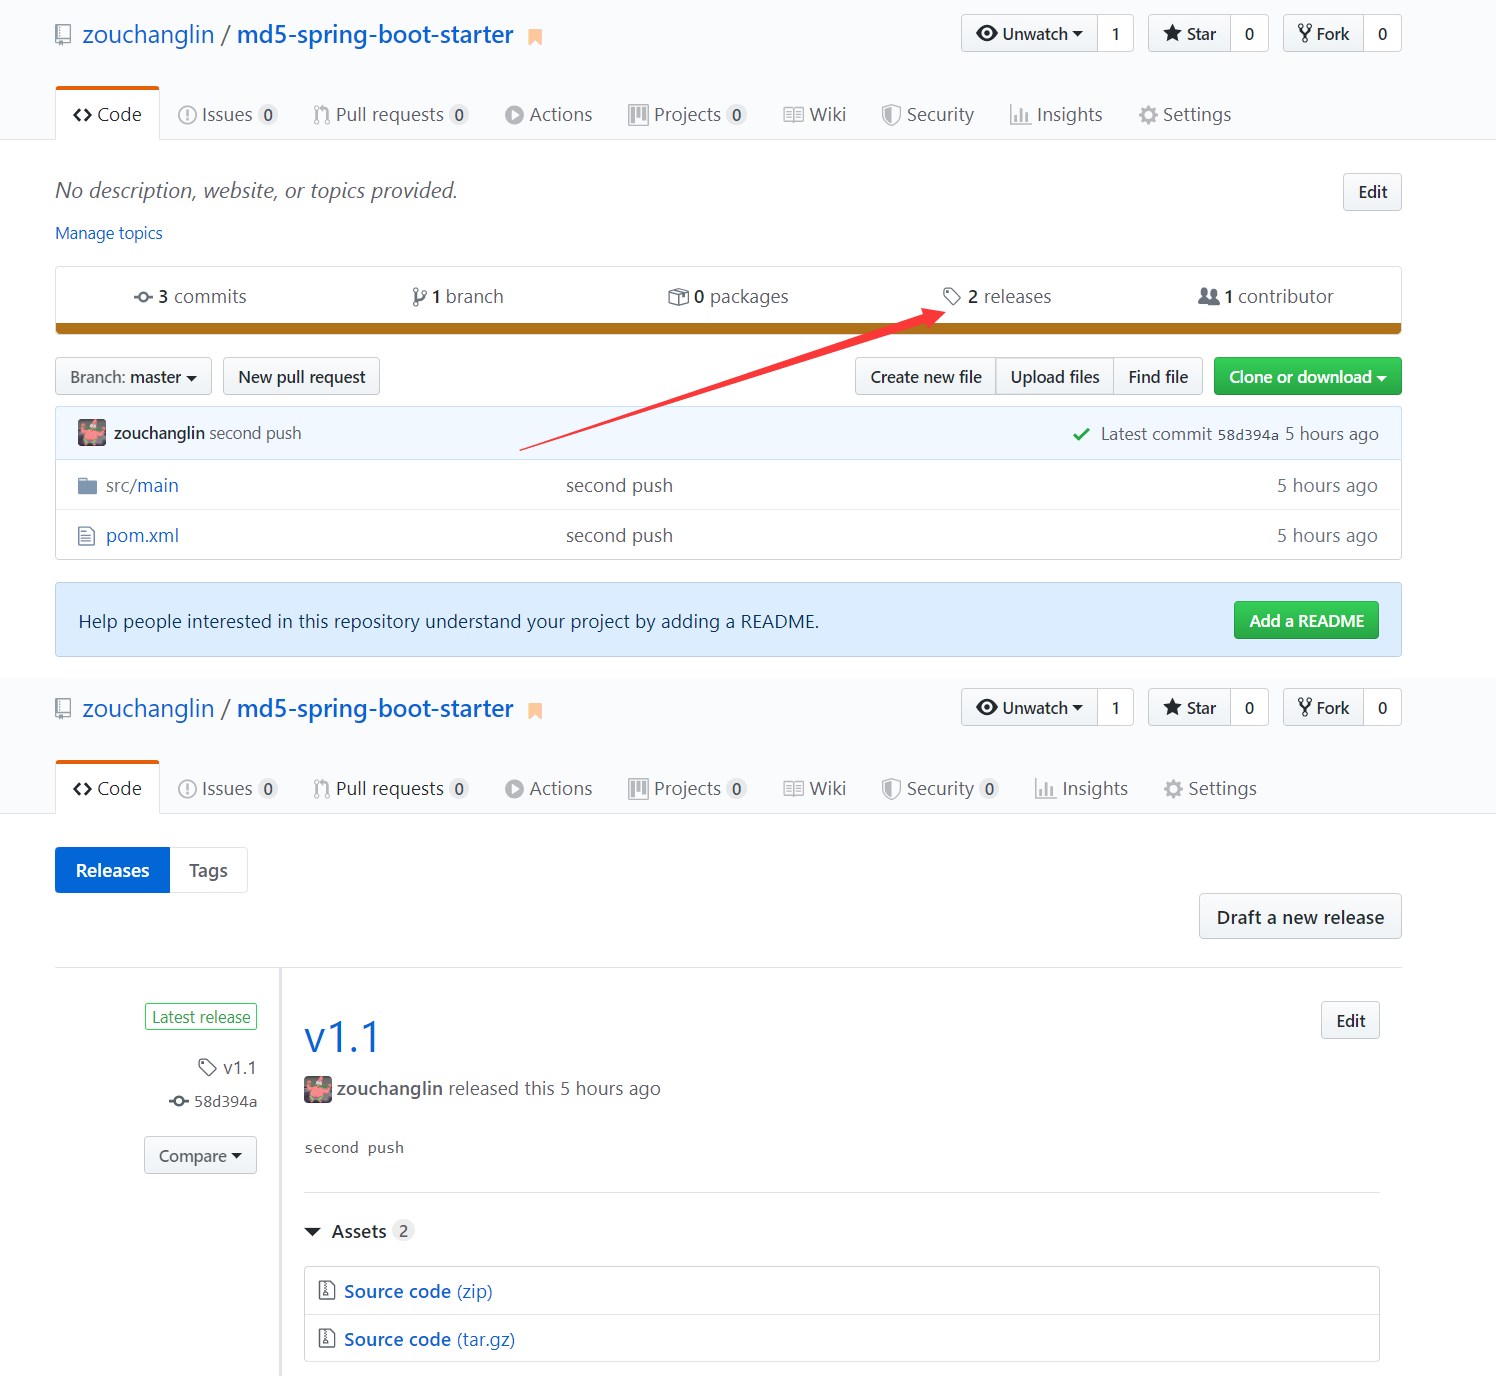
这个步骤比较容器,我们选择JitPack,JitPack在得到我们的GitHub账户授权之后可以拉取我们的仓库里的代码,我们只需要把项目放在GitHub上,并且打一个Tag(其实就是发布一个Release版本),我以我之前测试的MD5的一个starter来说, md5-spring-boot-starter ,只需要有发布版本即可:
然后在jitpack授权,授权之后即可看到自己的仓库和Release版本:
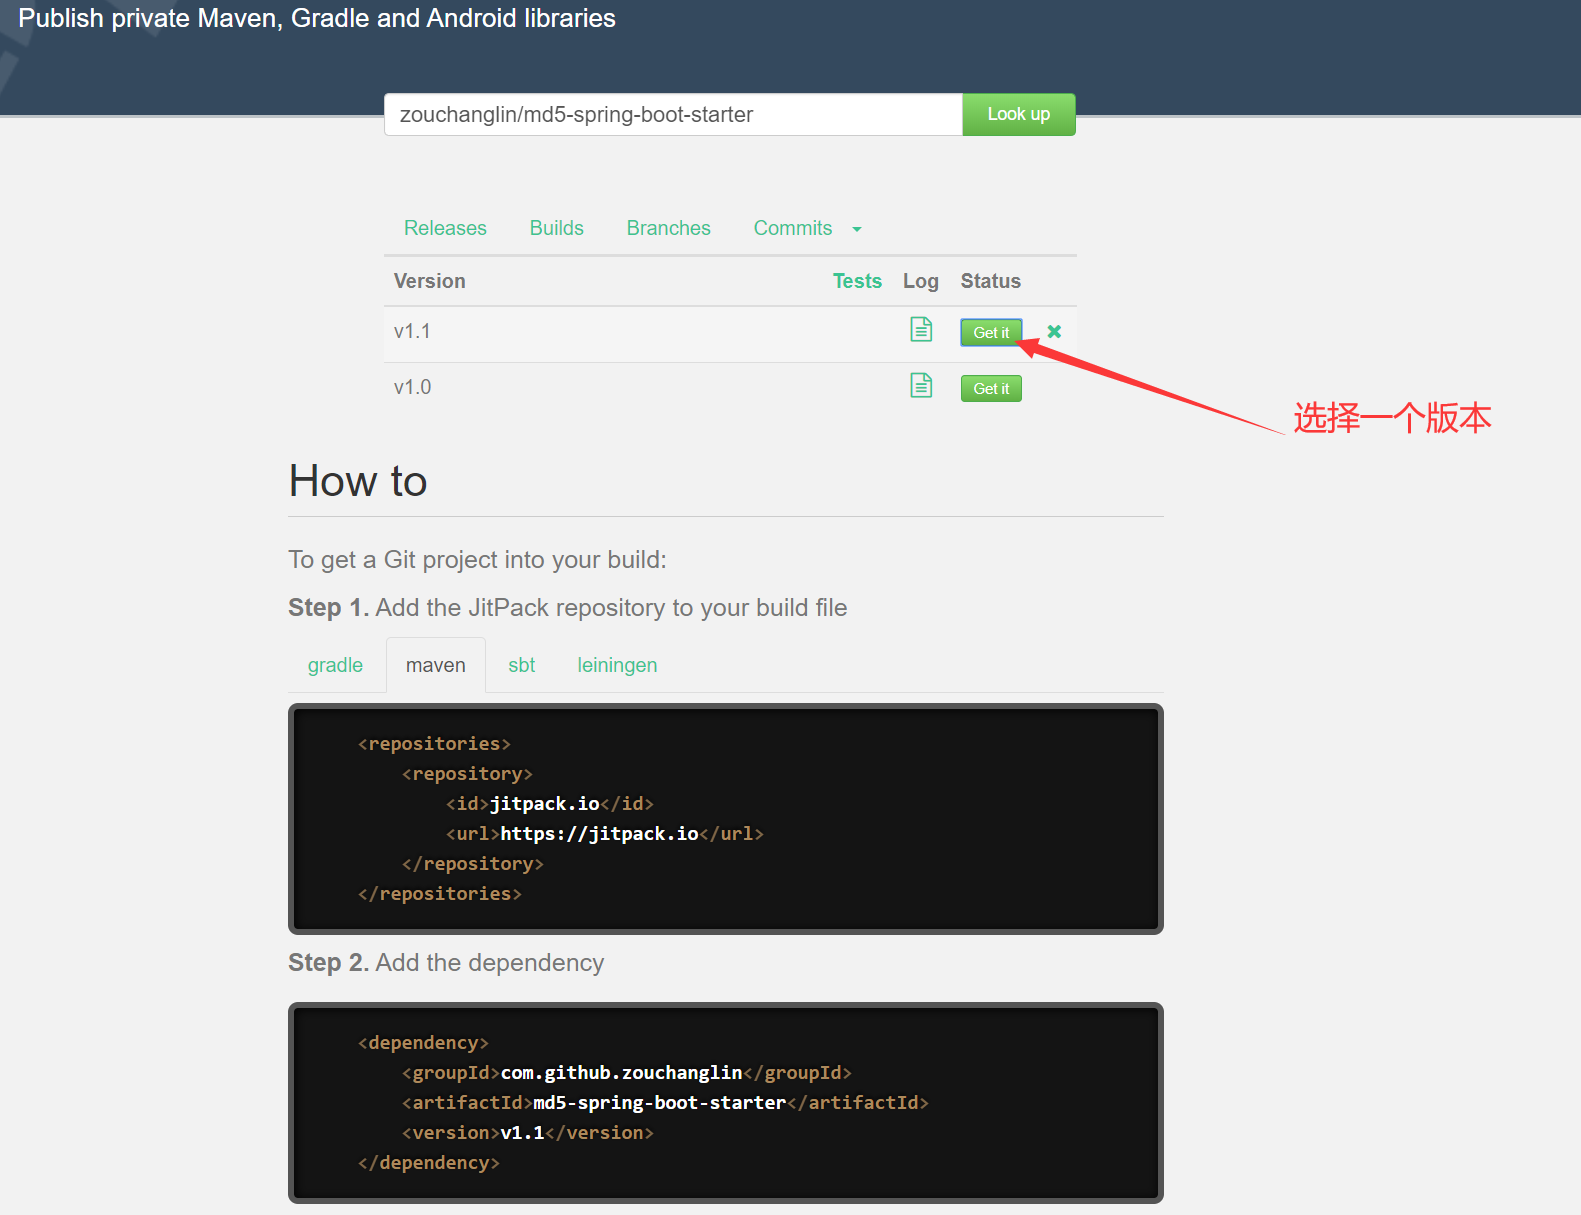
最后,在需要的项目中引入即可: